Blog

  • Load-Bearing Wall Removal: 6 Structural Ideas Across Homes

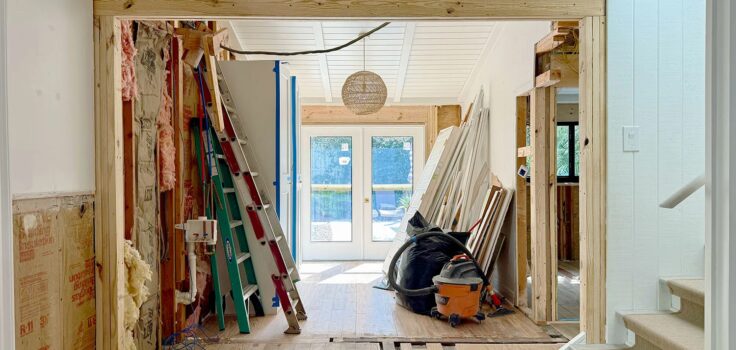
    Load-Bearing Wall Removal: 6 Structural Ideas Across Homes

    Understanding Load-Bearing Walls: Importance and Management

    Home construction and renovation projects often invoke a myriad of technical terms that can bewilder even the most seasoned DIY enthusiasts. Among these, the term “load-bearing wall” stands out due to its critical role in structural integrity. Understanding what load-bearing walls are, how they function, and how to manage them during a renovation is vital for any homeowner or builder.

    What is a Load-Bearing Wall?

    A load-bearing wall is a structural component in a building designed to support weight from the floors, roof, or other parts of the structure above it. These walls transfer the load down to the foundation, playing a crucial role in maintaining the integrity of the building. If modifications are made—such as removing or altering a load-bearing wall—it can severely impact the structural stability of a home, potentially leading to catastrophic failure.

    Identifying Load-Bearing Walls

    One of the most critical aspects of home renovations is identifying which walls are load-bearing. Below are some key indicators to help you determine if a wall is load-bearing:

    • Location: Load-bearing walls are usually found in the center of a home, parallel to the roof trusses or floor joists.
    • Thickness: Load-bearing walls are generally thicker than non-load-bearing walls, often made of solid materials like brick or concrete.
    • Continuous Structure: If the wall continues to a floor above, there’s a high likelihood it’s load-bearing.
    • Floor Joists Orientation: If the floor joists are perpendicular to a wall, that wall may be load-bearing.

    The Importance of Load-Bearing Walls

    Load-bearing walls are essential for several reasons:

    • Structural Support: They provide necessary support for the entire structure, ensuring the distribution of weight is managed safely.
    • Durability: Properly maintained load-bearing walls contribute to the longevity of a building.
    • Risk Mitigation: Understanding and preserving load-bearing walls minimizes the risk of significant structural damage during renovations.

    What Happens When You Remove a Load-Bearing Wall?

    Removing a load-bearing wall without implementing an alternative support system can lead to severe consequences, including:

    • Structural Collapse: The most immediate risk is the potential for the structure to sag or collapse.
    • Uneven Load Distribution: Removing a load-bearing wall can disrupt the distribution of weight, causing stress on other structural components.
    • Warning Signs: Issues such as cracks in the walls or ceiling may manifest due to the unbalanced load.

    Alternatives to Removing Load-Bearing Walls

    For homeowners aiming to create open spaces, there are alternatives to completely removing load-bearing walls:

    • Install Load-Bearing Beams: A steel or wooden beam can replace the load-bearing wall while redistributing weight safely.
    • Use Columns or Posts: These elements can provide adequate support and allow for larger openings.
    • Open Concept Designs: Consider redesigning with an open concept approach that strategically uses existing load-bearing walls.

    Cost Considerations

    Managing load-bearing walls during renovations is not just about structural safety; it involves financial planning too. The average costs associated with modifying or reinforcing load-bearing walls vary significantly based on several factors, including:

    • Location of the wall and its complexity
    • Materials used for creating beams or additional support
    • Labor costs for construction professionals

    Comparison of Costs for Different Support Options

    Support Option Estimated Cost Pros Cons
    Removing Load-Bearing Wall $2,000-$10,000 (including beam installation) Creates open space Risk of structural collapse if not done correctly
    Retrofitting with Beams $1,500-$5,000 Safe and effective weight distribution Can be labor-intensive
    Using Columns $1,000-$4,000 Preserves wall integrity May block visual lines

    Conclusion

    In summary, understanding load-bearing walls is essential for any homeowner considering renovations. These walls play a critical role in ensuring a home’s structural integrity. If you are unsure whether a wall is load-bearing, consulting with a structural engineer or qualified contractor is advisable before making any modifications. Ultimately, careful planning and execution of changes will ensure a safe, beautiful living space. Whether you’re looking to create an open floor plan or just want to update your interiors, navigating the complexities of load-bearing walls is a crucial step in the renovation process.

    Source link

  • Prefab ADU vs. Custom ADU: Which One Makes More Sense?[/gpt3]

    Prefab ADU vs. Custom ADU: Which One Makes More Sense?[/gpt3]


    The property should guide the ADU choice before a homeowner becomes attached to a model or floor plan. A design that looks ideal online can become a poor fit if the lot is narrow, the proposed location is difficult to reach, or the utility connections sit far from the new unit.

    Start by looking at the usable building area. Lot dimensions, slope, setbacks, trees, driveways, easements, and existing outdoor spaces can all affect where an accessory dwelling unit can sit. The placement also needs to leave room for a comfortable entrance, useful windows, and a reasonable sense of privacy for both homes.

    Access matters, too. A prefab unit needs a workable delivery and installation route, while a site-built project needs access for crews, materials, and equipment. Both have to account for the site’s limits.

    Existing structures deserve an honest assessment. An older garage can provide a foundation, walls, and a roof, but those components still need to be suitable for the proposed living space. We’ve even compiled garage transformation planning tips to explain why the condition of the floor, walls, roof, insulation, windows, doors, and utilities should be reviewed before the design is settled.

    The same property-first thinking applies to new construction. Our guide to planning and building an ADU in Chicago asks homeowners to consider how new foundations, roofs, plumbing, and electrical systems will meet the existing parts of the property. A custom ADU can be especially useful here because the design can develop around those conditions instead of asking the property to accommodate a fixed plan.


    Source link

  • How to safeguard your home from the hidden costs of power outages[/gpt3]

    How to safeguard your home from the hidden costs of power outages[/gpt3]


    (BPT) – When you think of power outages, you may initially imagine a minor inconvenience: You’re grabbing flashlights because you’re in the dark briefly, until power is restored. But recent extreme weather events combined with the aging power grid in many parts of the country have led to extended outages that can last not just hours but days or even longer, with essential appliances like your refrigerator and freezer losing power.

    At a time when grocery prices are soaring, the last thing you want is to lose an entire fridge and freezer full of food, not to mention other crucial items that need refrigeration and are hard to replace. If you’ve ever had to throw out a week’s worth of spoiled food, you know how disheartening it can be, not to mention the strain it can put on your household budget.

    On top of that, many other systems and devices in your home rely on power that you may not even think about. A gap in power can shut down your home office and Wi-Fi setup in the middle of a workday. Losing power can keep your fish tank’s filtration system and your plug-in recliner from working.

    These quiet, everyday essentials depend on one outlet working, so how can you ensure they keep running, no matter what? You need an emergency power supply.

    Protecting home necessities with backup power

    To make sure you never have to discard all your hard-earned groceries or worry about key appliances in your home not functioning, you need a reliable source of backup power that doesn’t rely on the power grid.

    Enter FridgeGuard*, the world’s slimmest smart fridge backup from Jackery, a global leader in portable power stations and solar generators. FridgeGuard is purpose-built to protect your home’s most essential, always-on appliance designed to set up once and remain ready. It switches to battery power in under 10 milliseconds, which is fast enough that your refrigerator’s compressor never registers a gap, and its 1600W peak output is specifically sized to handle the compressor’s startup surge. Thanks to 1024 Watt hours (Wh) of capacity, FridgeGuard delivers up to 15 hours of runtime (or 30 hours with an expansion battery).

    FridgeGuard, the world's slimmest smart fridge backup from Jackery, on top of a refrigerator.

    FridgeGuard also enables efficient, money-saving home energy planning. Its intelligent remote monitoring tracks energy use in real time, letting you delay output when needed, and craft personalized Time-of-Use scheduling with off-peak charging to keep your energy costs lower.

    Best yet, if your FridgeGuard’s battery is depleted but the power grid is still down, FridgeGuard supports recharging via solar panels and even a car to avoid downtime throughout longer-term emergencies.

    While your fridge is the focus of this backup battery, the same power can also keep your fish tank filtration system running, ensure that your plug-in recliner or lift chair is still operating, power your home office and Wi-Fi router without interruption.

    Using an LiFePO4 battery platform that retains at least 70% capacity after 6,000 cycles, which comes out to 16 years of daily use, FridgeGuard is engineered for long-term reliability. Backed by a 5-year warranty and UL1778, UL1741 and UL1973 safety certifications, the backup battery is made from UL94-5VA flame-retardant materials, plus an integrated surge protection and grid anomaly safeguards.

    Streamlined design that can be used anywhere

    Space limitations? No worries. FridgeGuard is built with a slim, wall-mountable 2.6-inch profile that’s designed to blend seamlessly and quietly into your kitchen, or wherever its companion appliance is. For placement flexibility, you can tailor its orientation precisely to any kitchen layout with either floor-standing, bracket-mounted or wall-mounted configuration options.

    But you won’t necessarily want FridgeGuard hidden away. With four prestigious design awards, including the iF Design Award 2026, it combines form and function all in one, providing the minimalistic and refined look a modern home deserves, along with backup capabilities that give homes the long-term energy backup solution they need.

    The setup is easy: Simply connect FridgeGuard to a traditional wall outlet and plug your refrigerator or other essential device into FridgeGuard directly. FridgeGuard’s streamlined, always-ready dependability eliminates the hassle of having to move anything around when a storm hits.

    Rising electricity costs, persistent inflation, the increasing frequency of extreme weather and growing grid instability are all prompting more homeowners to rethink the importance of home energy self-reliance. Now you can keep your refrigerator and most essential appliances running, no matter what the grid is doing.

    Visit Jackery.com to learn more about FridgeGuard. FridgeGuard has launched as a Costco exclusive, available at Costco.com and at physical locations in select regions.

    *FridgeGuard features a single AC outlet capable of supporting a total continuous draw of 800W.

    Facebooktwitterredditpinterestmail


    Source link

  • How to keep your home powered during a summer heat wave[/gpt3]

    How to keep your home powered during a summer heat wave[/gpt3]


    (BPT) – It’s a scorching summer weekend, but the heat wave hasn’t stopped you from gathering outdoors for a good old-fashioned cookout with friends and family. You’re busy searing meats and veggies on your electric grill while your guests dance to the sounds of the summer pumping from the speaker system. The heat doesn’t bother them. They’re protected by the shade and cooled by the outdoor fans you’ve set up for the occasion.

    Indoors, your spouse is busy in their home office, fingers flying over the keyboard as they finish up a work assignment before they grab the sides and extra beverages and join the festivities outdoors. By their feet is the family’s canine companion, enjoying the AC that’s on full blast 24/7.

    All in all, it’s a normal summer … until it’s not.

    Suddenly, the grill sizzles out, the music cuts and the fans slow. Indoors, the computer monitor goes black, the refrigerator stops humming and the AC stills. The grid is out and your weekend just got a whole lot more complicated.

    But what if you could keep the party going, work connected and air conditioning pumping? To keep your summer normal, even during abnormal situations, it’s time to consider a home backup power solution.

    Powering nonstop summer fun

    Whether you call them portable power stations, solar generators or home batteries, home backup power solutions are for more than just emergencies. These reliable portable solar power systems can ensure that your life continues as planned even when the rest of the neighborhood goes dark.

    For example, your cookout can keep going uninterrupted by powering all your outdoor appliances and electronics with the Jackery HomePower 3600 Plus. This portable solar generator features built-in wheels and telescoping handles, making it easy to roll between rooms, move indoors or transport to wherever power is needed. It’s even Manual Transfer Switch capable. All the benefits and more of a gas generator with none of the downsides.

    You won’t even notice that the power has blinked out. You’re too busy serving food hot off the grill while your friends and family enjoy your summer playlist with cold drinks in their hands, cooled by the breeze of the fans.

    Indoors, your spouse can keep working uninterrupted because the monitor, desktop, modem and router are all connected to the Jackery HomePower 1000 v2. Thanks to its 1500W output and built-in 3kV surge protection, you can be sure that you never lose connection while working on an important assignment or running an AI assistant. You can even run a laptop for up to 57 hours on one charge.

    If the blackout persists through Monday, you won’t have to worry about the food in the fridge spoiling. A power station like the Jackery HomePower 2000 Plus v2 can power a fridge for 48 hours. When you need more power, hook up the station to portable solar panels, where it can fully recharge in about three hours.

    During a heat wave, you won’t have to worry about your home becoming a sauna. By connecting a whole-home battery system like the Jackery Solar Generator 5000 Plus and a Smart Transfer Switch, you can rest easy knowing that you can keep the indoors cool during the hottest parts of summer.

    This simple and affordable installation in comparison to permanently installed, grid-tied systems, ensures that when the power goes out, the home backup battery will automatically kick in, maintaining your house as usual: cool, lit, and keeping your refrigerator and electronics running. When you need to recharge the Solar Generator 5000 Plus, you’ll have eight methods to choose from, including high-voltage solar charging from an existing rooftop solar panel ecosystem.

    If you’re away from home when the power goes out, no worries. Using the Jackery App, you can monitor your whole-home power usage, so you won’t have to worry about your beloved pet having to weather the stifling heat when you’re away from home. And you can continue monitoring them through your pet camera.

    Enjoy summer uninterrupted

    Family preparing dinner in kitchen while using the Jackery Home power 3600 to powering a hot plate.

    No matter what you do this summer, your life won’t have to come to a standstill when an outage hits, due to a heat wave or other unplanned cause of blackout, like a summer storm or wildfire. There are plenty of choices from Jackery’s line of portable power stations and whole-home backup systems to keep your home running reliably and smoothly. To learn more about how to keep your life powered, visit Jackery.com.

    Facebooktwitterredditpinterestmail


    Source link

  • The role of water in back-to-school wellness[/gpt3]


    (BPT) – As students return to the classroom, back-to-school planning extends beyond school supplies and class schedules. It’s also an ideal time for families to create strong routines that support their children’s wellness, foster family well-being and keep household essentials running smoothly.

    From hydration habits to laundry care to snacks, these everyday practices can play a meaningful role in helping families start the school year strong. Consistent routines that prioritize hydration, nutrition, cleanliness and household maintenance can help support healthy, productive learning environments.

    Why water quality matters throughout the home

    Water plays a bigger role in overall well-being than many families realize. According to a study published in the National Library of Medicine, “even mild dehydration, as little as a 1%–2% loss in body water, can negatively affect children’s attention, memory, mood and cognitive performance, all of which are critical for learning.” While healthy eating habits often receive the most attention, the quality of the water students drink each day is key. Clean, great-tasting water can support healthy hydration habits and make it easier for families to choose water over sugary beverages.

    Water quality can influence how much water children and adults drink. When water tastes and smells fresh, family members may be more likely to reach for it throughout the day. Additionally, as concerns about water quality continue to grow, many households are looking for ways to improve the water they use every day. Kinetico®, a global leader in water treatment solutions, recently introduced HYDRO® ECO™, an electric tankless reverse osmosis system designed to meet the needs of families. By providing cleaner, better-tasting water, hydration can be a simple and sustainable part of a healthy school-year routine.

    Building a healthier lunchbox

    A well-balanced lunch can help students be ready to learn throughout the school day. When packing lunches and snacks, families can look for foods that provide a balanced mix of nutrients while also supporting healthy hydration habits.

    Pairing water with fruits and vegetables is an easy way to support this balance. Water-rich foods such as watermelon, oranges, cucumbers, celery and bell peppers naturally contain high amounts of water, helping students stay hydrated while providing essential vitamins and minerals.

    Families can also encourage healthier beverage choices by packing a reusable water bottle each day. Keeping water readily available makes it easier for students to make hydration a regular part of their school-day routine.

    Protecting school clothing and uniforms

    Back-to-school shopping extends beyond classroom supplies. Every year, families also invest in back-to-school clothes, uniforms and athletic wear. With households spending hundreds of dollars preparing for the school year, protecting those purchases can be an important part of keeping costs manageable.

    That protection often starts in the laundry room. Using a trusted detergent, following garment care instructions and avoiding overloading the washing machine can all help extend the life of clothing. Water quality can also play a role. Hard water can leave mineral residue on fabrics, which may contribute to damage and wear over time. Whole-home water softening solutions, from providers like Kinetico, can help reduce the effects of hard water on laundry, helping school clothes and uniforms look and feel their best longer.

    Healthy habits beyond the classroom

    The beginning of the school year is an opportunity to build healthy habits that support student and family wellness. By prioritizing hydration, balanced routines and thoughtful home care, families can create a strong foundation for success.

    Facebooktwitterredditpinterestmail


    Source link

  • Bathroom Hardware Ideas: A Guide To Smart Choices In The Bath

    Bathroom Hardware Ideas: A Guide To Smart Choices In The Bath


    Essential Considerations for Bathroom Hardware Placement

    Designing a bathroom is an exciting yet challenging task. Among the numerous aspects to consider, the placement of bathroom hardware such as bars, hooks, pulls, and holders plays a crucial role in functionality, aesthetics, and overall user experience. Proper hardware placement avoids conflicts with doors, drawers, outlets, tile edges, and shower glass, thereby enhancing the efficiency of the space. This article highlights the importance of getting a contractor involved, practical tips for hardware placement, and common considerations for a seamless bathroom design.

    Why Involving a Contractor is Essential

    While DIY enthusiasts might be tempted to handle bathroom hardware placement on their own, consulting a contractor can provide invaluable insights. A skilled professional will not only ensure that your design vision is accurately captured but will also observe technical elements you might overlook. Here’s why engaging a contractor is essential:

    • Expert Advice: Contractors bring years of experience to the table and can recommend the best materials and design practices tailored to your specific space.
    • Structural Support: Many types of bathroom hardware, such as grab bars or heavy towel bars, require secure mounting. Contractors can add the necessary support inside the wall to ensure your fixtures are safely installed.
    • Eliminating Conflicts: An experienced contractor will map out the layout meticulously to avoid potential conflicts. This includes ensuring that hardware does not obstruct doors, drawers, or existing plumbing and electrical fixtures.

    Key Considerations for Bathroom Hardware Placement

    When planning the placement of bathroom hardware, there are several factors that need careful evaluation:

    1. Functionality

    The primary purpose of hardware placement is to enhance functionality. Consider how you use the bathroom daily. Items such as towel bars and hooks should be easily accessible yet strategically placed to avoid clutter. For instance:

    • Install towel bars close to the shower or bath for convenience.
    • Hooks should be placed at an appropriate height for all users, including children.

    2. Space and Layout

    Bathroom layouts can vary significantly, from compact half-baths to spacious master bathrooms. The size and configuration of your bathroom will influence hardware placement:

    • Small Bathrooms: In a limited space, wall-mounted options are beneficial. Folding hooks or compact cabinets can maximize usability without consuming too much space.
    • Large Bathrooms: You have more freedom. Consider dual towel bars or even a luxurious towel warmer if you have sufficient wall space.

    3. Aesthetic Appeal

    The visual impact of hardware cannot be ignored. Choose hardware that complements the overall design of your bathroom. Here are some tips:

    • Consider matching colors and finishes with fixtures such as faucets and showerheads.
    • Use modern designs for contemporary bathrooms and vintage styles for classic decor.

    4. Clearing Obstacles

    One of the biggest mistakes in bathroom hardware placement is ignoring existing elements. When planning:

    • Ensure that towel bars are installed away from doors to prevent snagging.
    • Check that hooks and holders do not obstruct drawer openings or impair access to outlets.

    5. Height Consideration

    Height is a crucial factor in ensuring that bathroom hardware is accessible for all users:

    • Towel Bars: Typically, these should be set about 48 inches from the floor.
    • Grab Bars: The standard height is 33-36 inches, making them accessible for individuals with mobility challenges.

    6. Incorporating Technology

    With the rise of smart homes, you might want to integrate technology into your bathroom hardware. Consider installing:

    • Smart towel warmers that can be controlled via an app.
    • Motion-sensor lighting for easier access to hooks and bars.

    Comparison of Common Bathroom Hardware Types

    Hardware Type Best Use Installation Difficulty Cost Range
    Towel Bar Hanging towels near bathing area Medium $10 – $50
    Towel Hook Quick access for towels Easy $5 – $30
    Grab Bar Support for getting in/out of the shower High (requires wall reinforcement) $20 – $100
    Toilet Paper Holder Convenient toilet paper access Easy $5 – $25
    Shower Caddy Storing shower items Medium $15 – $60

    Conclusion

    Investing time in planning your bathroom hardware placement will significantly enhance the functionality and aesthetics of your space. By enlisting the help of a qualified contractor, you can ensure that structural supports are added for heavier fixtures and that everything is installed perfectly to avoid conflicts. Remember to consider factors such as functionality, the layout of your bathroom, aesthetic appeal, and height when positioning hardware. By following these guidelines, you can create a bathroom that serves your needs effectively while remaining stylish and inviting.


    Source link

  • Washer and Dryer Installation: Requirements, Steps & Cost Guide

    Washer and Dryer Installation: Requirements, Steps & Cost Guide

    Comprehensive Guide to Washer and Dryer Installation

    Installing a washer and dryer can appear to be a straightforward task, but there are numerous factors that must be considered to ensure a successful installation. This comprehensive guide aims to simplify the installation process, covering everything from basic placement to the more complex requirements like plumbing, electrical connections, and ventilation. Understanding these areas will help you effectively set up your appliances while ensuring they operate efficiently and safely.

    Understanding Basic Washer and Dryer Installation

    The installation of a washer and dryer typically involves four primary tasks: placing the appliances, connecting them to existing hookups, leveling them, and testing their functions. Let’s explore these stages more closely:

    1. Placing the Appliances

    The first step in the installation process is placing the washer and dryer in their designated space. This requires careful consideration of several factors, including:

    • Space Availability: Measure the area to ensure it can accommodate both appliances comfortably.
    • Accessibility: The location should allow easy access for loading and unloading laundry.
    • Proximity to Hookups: Make sure the washer is near water supply lines and drain systems.

    2. Connecting to Existing Hookups

    In most cases, the most straightforward installations involve connecting the appliances to pre-existing hookups. This includes connecting water hoses to the washer, as well as plugging in the dryer to an electrical outlet or connecting it to a gas line for gas dryers. The following are some key points when connecting to existing hookups:

    • Water Supply for Washers: Ensure you connect the hot and cold water lines correctly, typically red for hot and blue for cold.
    • Drainage for Washers: The washer’s drainage hose should be securely positioned within the standpipe or drain.
    • Electrical Connections for Dryers: For electric dryers, ensure the circuit can handle the required amperage.

    3. Leveling the Appliances

    Once positioned and connected, leveling the appliances is essential. An unlevel washer can cause excessive vibration during cycles, leading to noise and operational inefficiency. Here’s how to level them properly:

    • Check the manufacturer’s manual for specific instructions on leveling.
    • Adjust the feet of the appliances until they sit evenly on the floor using a level tool.
    • Ensure the appliances are stable and do not rock by pushing them gently.

    4. Testing the Appliances

    After everything is set up, the final task is testing both appliances. This includes:

    • Running a short wash cycle to check for leaks and proper drainage.
    • Starting the dryer to ensure it heats up effectively and ventilates correctly.

    When to Consider a Larger Project

    While basic installation is often manageable for many homeowners, there are instances where a larger project is necessary. This may involve new plumbing, electrical service, gas lines, dryer ventilation, or even obtaining permits. Here’s a breakdown of potential larger projects you might encounter:

    1. New Plumbing

    If your laundry area does not have existing water supply lines or if the lines are outdated, you may need professional plumbing services to install new supply and drainage systems.

    2. Electrical Service Upgrades

    Older homes may not have the amperage needed for modern washers and dryers, particularly electric models. Upgrading your home’s electrical service may require hiring a licensed electrician to ensure the power supply can handle the load safely.

    3. Installing Gas Lines

    If you are opting for a gas dryer and do not already have a gas line, installing one should be performed by a qualified professional. Improper installations can lead to dangerous gas leaks.

    4. Ventilation Requirements

    Proper ventilation is crucial for dryer safety and efficiency. If your space lacks appropriate ductwork or vents, consider hiring a professional to install them to prevent excess lint buildup and improve airflow.

    5. Permits and Local Regulations

    In certain areas, you may need permits for plumbing or electrical work. Check with your local regulations to ensure compliance and safety.

    Cost Comparison: DIY vs. Professional Installation

    The choice between performing a DIY installation and hiring a professional can significantly impact both costs and results. Below is a comparison of the potential costs associated with each option:

    Cost Aspect DIY Installation Professional Installation
    Labor Cost Free (Personal labor) $150 – $500 on average
    Tools/Equipment $50 – $200 (if needed) Included in service fee
    Potential Repairs Cost variable (possible future repairs) Less likely with professional expertise
    Time Invested Several hours to a day Typically completed in a few hours

    Conclusion

    Installing a washer and dryer may seem like a simple home improvement task, but it can involve several key steps and decisions. Understanding the basic installation process is essential, as is recognizing when to engage professionals for more complex situations. By thoroughly planning your installation and being aware of the implications of DIY versus professional help, you can ensure that your laundry appliances operate effectively and safely for years to come.

    Source link

  • Kitchen Pass Through: Design Ideas for Connected Interiors

    Kitchen Pass Through: Design Ideas for Connected Interiors


    The Ultimate Guide to Widening or Lowering Your Kitchen Pass-Through

    Are you looking to enhance the functionality and aesthetics of your kitchen? One effective way to achieve this is by modifying your kitchen pass-through. This guide will explore the possibilities of widening, lowering, or otherwise reworking an existing pass-through, ensuring you have all the information needed for a successful remodel.

    Understanding Kitchen Pass-Throughs

    A kitchen pass-through, also known as a serving window, is an opening that connects the kitchen to an adjoining room, often creating a more open, interactive living space. It allows for easy food serving and can help bring natural light into your kitchen. However, many homeowners find their existing pass-throughs restrictive and outdated. Fortunately, with the right approach and planning, these spaces can be transformed to fit modern needs.

    Assessing Structural Conditions

    Before you proceed with any modifications, it’s essential to evaluate the existing structure of your pass-through. Here are vital factors to consider:

    • Wall Structure: Determine whether the wall is load-bearing or non-load-bearing. Modifications to a load-bearing wall require additional structural support.
    • Hidden Utilities: Check for any plumbing, electrical outlets, or HVAC ducts that may obstruct the desired changes. Engaging a contractor or an inspector can help reveal any hidden complications.
    • Cabinet Layout: If cabinets flank the pass-through, consider how the new dimensions will affect their placement. You may need to reconfigure or replace cabinetry.
    • Required Approvals: Depending on your local laws, you may need to obtain permits before making any alterations. Be sure to check with your local building authority.

    Consulting a Professional Contractor

    Once you have assessed the structural conditions, it’s time to consult a contractor experienced in kitchen renovations. A skilled contractor can evaluate your plans and provide insights on feasibility and costs. Here’s why hiring a professional is crucial:

    • Expertise: Professional contractors possess the skills and experience needed to safely modify the structural elements of your home.
    • Design Advice: They can suggest design ideas that enhance functionality and aesthetic appeal.
    • Compliance: They ensure that all renovations meet local building codes and regulations, preventing future legal issues.

    Cost Considerations

    The cost of widening or lowering a pass-through can vary significantly based on several factors, including:

    • Scope of Work: Simple changes may cost less, while extensive modifications could require more resources and time.
    • Material Selection: Choices such as countertops, framing materials, and finishing options will influence the overall budget.
    • Labor Costs: Labor can account for a significant portion of the budget, particularly if additional structural work is required.

    It’s essential to gather detailed estimates from multiple contractors to ensure you receive a fair price.

    Designing the New Pass-Through

    Once the structural aspects are assessed and the costs are determined, it’s time to focus on design. The new pass-through should not only serve a practical purpose but also elevate the overall decor of your space. Consider the following design elements:

    • Dimensions: Decide how wide and low you want the pass-through to be. Widening can create a more expansive feel, while lowering can bring a cozy, inviting atmosphere.
    • Style: Consider a modern cut-out, a farmhouse-style arch, or a classic rectangular design depending on the theme of your home.
    • Complements: Ensure that the new design complements existing architectural features such as trim or cabinetry.

    Final Thoughts and Next Steps

    Enhancing a kitchen pass-through is a fantastic way to improve both functionality and aesthetics. With careful planning, professional consultation, and thoughtful design choices, your kitchen can become a more open and inviting space.

    Before diving into your renovation project, create a thorough action plan: Conduct assessments, consult with contractors, decide on design elements, and set a budget. By taking these steps, your remodeled pass-through can become the highlight of your home.

    Comparison Table: Options for Kitchen Pass-Through Modifications

    Modification Type Pros Cons Average Cost
    Widening More open space; improved accessibility May require support beams; more expensive $2,000 – $5,000
    Lowering Cozy feel; encourages interaction Can limit sightlines; may require added support $1,500 – $4,000
    Both Maximized flow; ultimate customization Most expensive; complex construction needs $4,000 – $10,000

    Taking the plunge to modify your kitchen pass-through can significantly enhance both the look and feel of your home. With thorough planning and professional help, you can create a space that you and your family will love for years to come.


    Source link

  • Staircase Renovation Ideas: From Separate Floors to One Home

    Staircase Renovation Ideas: From Separate Floors to One Home

    Maximizing Awkward Spaces: Transforming Staircase Areas into Functional Storage

    Every homeowner has faced the challenge of utilizing awkward or underused spaces around the house. One of the most common culprits for wasted space is the area beneath a staircase. Instead of letting this valuable area sit empty, consider using it for customized storage solutions. A well-planned basement remodel can convert the space below your stairs into a functional, organized, and aesthetically pleasing part of your home.

    The Benefits of Smart Staircase Storage Solutions

    Utilizing the space under your staircase comes with numerous advantages:

    • Enhanced Organization: A designated spot for frequently used items can reduce clutter around your home.
    • Increased Functionality: The area can serve multiple purposes, from storing tools and luggage to housing laundry supplies and seasonal items.
    • Improved Aesthetics: Well-designed storage solutions can enhance the visual appeal of your home and turn an awkward area into a design feature.
    • Maximized Space: If you have a small home or basement, utilizing every inch of available space is crucial.

    Transforming the Staircase Area: A Case Study

    During a recent basement remodel in Brooklyn, contractors successfully transformed an awkward staircase area into an organized treasure trove of storage. The project involved several key features:

    Custom Closets

    Instead of leaving the under-stair space empty, the contractors created sturdy closets to maximize the functionality of this area. These custom-built closets now house everything from seasonal clothing to extra blankets and linens, adding convenience and style to the basement.

    Open Shelving and a Storage Island

    To further enhance utility, open shelving units were installed. This provides easy access to tools and materials, making it perfect for DIY projects. Additionally, a storage island serves as a central hub for work materials, organized storage for luggage, and even supplies for hobbies.

    Design Elements that Elevate the Space

    Beyond the structural elements, the visual design of the basement plays a significant role in making the space feel inviting and well-integrated:

    • White Paint: The use of white paint across the walls, floors, and even the stairs contributes to a sense of openness and brightness, which is especially valuable in a lower level that might otherwise feel cramped or dark.
    • LED Lighting: Installing 18 recessed LED lights not only adds brightness but also enhances the overall ambiance. Good lighting is crucial in making any space feel larger and more welcoming.

    Creative Storage Solutions for Your Home

    If you’re inspired by the Brooklyn remodel, here are several creative storage solutions you might incorporate in your own home:

    Custom Built-Ins

    Built-in shelves or cabinets can be tailored to fit the exact dimensions of your staircase, ensuring maximum use of the available space.

    Bench with Storage

    A bench that doubles as a storage unit can serve both aesthetic and practical purposes, allowing you to sit while accessing stored items.

    Multi-Purpose Furniture

    Furniture that serves dual purposes, such as ottomans with hidden compartments, can help keep the area uncluttered while adding style.

    Wall Hooks and Racks

    Using the walls for added vertical storage can free up floor space. Hooks or racks can hold bags, coats, or other items for easy access.

    Comparison Table: Storage Solutions for Under-Stair Spaces

    Feature Custom Closets Open Shelving Storage Islands Multi-Purpose Furniture
    Maximizes Vertical Space
    Easy Access
    Customizable
    Aesthetic Appeal

    Conclusion

    Transforming the space beneath your stairs into a functional storage area not only optimizes your home’s organization but also enhances its overall appeal. From custom closets and open shelving to storage islands and multi-purpose furniture, the possibilities are endless. With the right design elements and creative approach, you can convert this awkward space into one of the most useful and stylish parts of your home. So why let that valuable area go to waste? Consider a renovation today, and greet a more organized, welcoming home.

    Source link