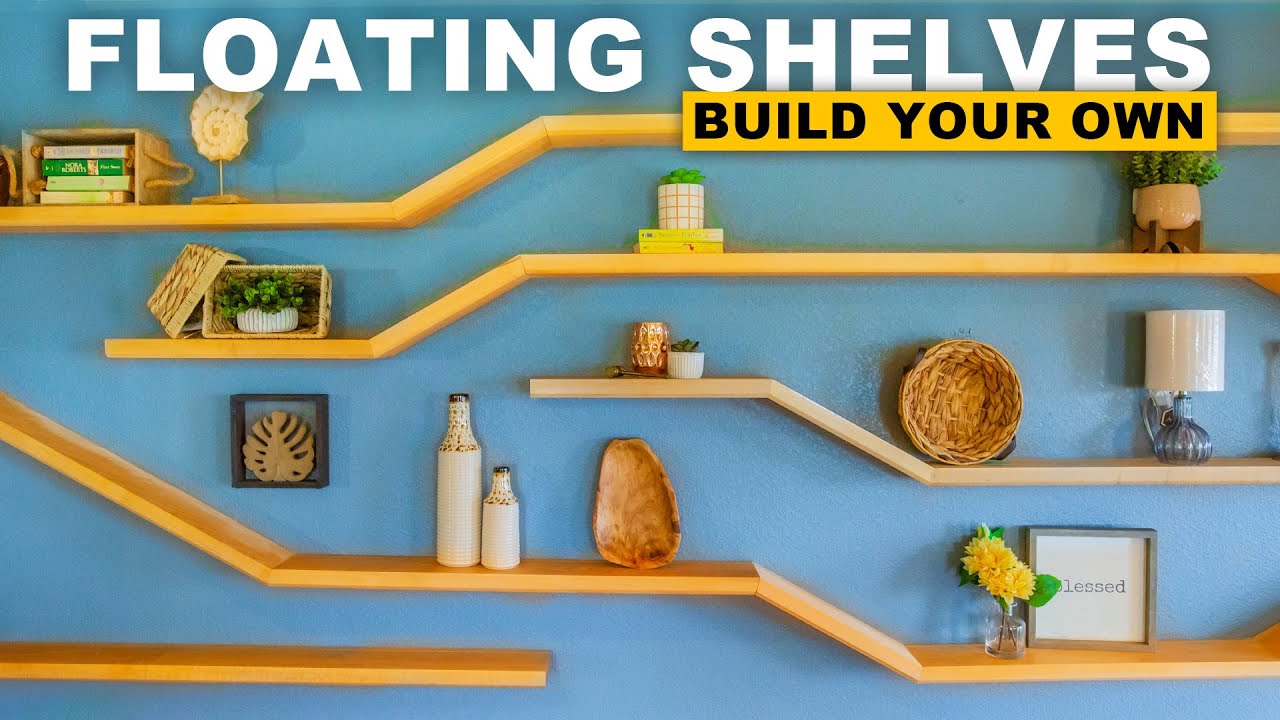
In this video I’m going to show you how I built this shelf. It might look simple, but it was actually full of little tricky things to figure out. But! It was worth it, as I had this very generic store bought shelf in my home before, and was finally able to replace it with something I’ve made instead.
Let’s Build a Modern Wall Shelf!
If you’re looking for an interesting shelf design then I hope you found this inspiring. I have a set of plans, not only for this project but many others, available on my website if you want to check it out.
Modern Wall Shelf Plans
$9.99
Materials I Used to Build this Modern Wall Shelf
wood
Wood Glue
Saw
Screws
Wood Finish
Nailer
Step 1: Cutting the Wood for the Modern Wall Shelf
I had walnut and maple in my shop already so I made mine from that. I started by cutting to length all the parts to make up the center hexagon that’s made from walnut. I cut all these boards just slightly longer than really needed. So that in the next step, when I cut in all the angles, I could have some wiggle room to get them all perfect. I first cut in the miter cut on one end of each board needed. Then when cutting the second side, I set up a stop block so I could make sure they all turned out the same. You can test the accuracy by placing them back to back to each other.
Step 2: Fit Test for the Hexagon Part of the Shelf
Next I did a test fit just to make sure things were looking correct. They were, so next I prepped to start applying glue. When doing miters it’s a good trick to lay down a piece of tape on the inside face first because there will be glue squeeze out and the inside face is always a little time consuming to clean up but a piece of tape lining the miter, solves that.
Another tape trick to help with gluing up miters is to lay out a length of tape long enough for all the pieces. My arms are just barley long enough, and I actually laid down two because of the depth of my pieces. This is so I can lay all my parts, perfectly end to end, on top of the tape. Then I apply the glue. I’m not going overboard on the glue, I’m just making sure the entire face of each miter is covered.
Now I can start on one end, and roll things together. Using that tape to help each each miter in it’s place as I make the roll. The tape can also act as a clamp, giving me a way to hold the hexagon together as the glue has time to set up. However, since I have a 23 gauge nailer, I went ahead and shot a few pin nails into each joint so I wouldn’t have to wait for the glue to dry. If you don’t have a pin nailer, then give it an hour before removing the tape.
Step 3: Cutting the Straight Shelves
There’s actually two more walnut pieces to this unit but they are just straight shelves with no explanations needed so lets move on to the maple triangles that accompany the walnut hex.
These can absolutely be cut the same way as the walnut mitered pieces at the miter saw however I wanted to show you a different method that is typically more accurate and that is with a sled at the table saw.
If you have a table saw then I do recommend doing all the pieces this way. What I did was tilt the blade of my saw then use a sled to move my piece through the blade to cut one end on all the pieces. Then I set up a stop block to cut all the board’s second end, also cutting the board to length with this cut. Any time you’re making a geometric shape like these, the final product will look the best if all the pieces are as identical as possible which is where using a more accurate tool will pay off but know that it can still be made regardless on which tool you have.
Step 4: Piecing the Triangle Shelves Together
Unlike the hex, the triangle will actually have an exposed miter cut on all three sides so I did a dry fit to first align things…..there we are. This way I could make sure I was applying glue to the correct portion of the board. The roll up tape trick doesn’t work on a connection like this so instead I threw in a few pin nails on each side. However, if you don’t have a pin nailer remember that tape is a great clamp while glue sets up!
Since my design has two triangles, I repeated the process to make a second.
Step 5: Joining the Hex and Triangles
Now, the tricky part folks. Joining things together. In the end product, these triangles will slip right over the horizontal portion of the hexagon shelf. I would actually prefer to make these cuts at the table saw but the blade on it will only go to 3” and I needed 4”. So instead I used the miter saw.
After making all my marks indicating where the cuts needed to be, I set the depth on my miter saw so it could go 4” deep. I cut the outline lines of my marks, actually going slightly inside them because you can always take away more but it’s hard to put back. My intention was to take away the remaining inside one cut at a time, but the first cut was enough to break it out of there. With that done, I just had to get the bottom flat which I did by lowering the saw to it’s full depth of 4” then slowly moving my board left and right until the blade hit the side walls of my cut.
I kept my shelf piece handy so I could test fit things and make adjustments. It was too small to start, so I took a little bit more away until the shelf could easily slip into place.
The thing I like about the miter saw for the triangles is I was able to cut both slots at the same time but on the shelf I took a different approach to show you an alternative method should you want to build these
For the shelf I used the bandsaw.
The thing with the bandsaw is the deck will tilt but only one way, and I’m going to show you that cut first even though I made it second in real life. This cut is easy, tilt the deck, line up the blade, make both outside cuts first, then chop away the inners until you have a nice rectangle hole. To get a flat bottom, I like to get close to the line with my straight cuts, but then, just like what I did at the miter saw, I move the piece slowly left and right going across the blade to level things out.
Step 6: Making the Second Cut on the
For the second cut, which is opposite of the first, you can’t move the table down so instead I moved the part up by way of a jig. This jig is a scrap of wood that is cut to the proper angle, that is secured to the miter gauge of the bandsaw, then another scrap is attached to the top to give me a fence to hold my part flush up against. This will allow me to hold my part in place and move it into the blade at a 90 but it actually be cutting in at the angle needed to slip right on the other parts.
Step 7: Finishing touches! Staining the Modern Wall Shelf
Lets see if it worked. On this part I was being very careful because those outside pieces will be fragile and break off if I forced it down too much. So I took my time to wiggle it on nice and square.
That was the last complicated bit, now it was just down to finishing. For a hanging method, I attached some simple store bought brackets to the top walnut horizontal shelf. Since everything is attached, it’s the only thing that’s needed.
Then I put on a coat of finish. Something I’ve taken to doing is applying some shielding lotion to my hand prior to finishing. This lotion is called Gloves in a Bottle and bonds with the top layer of your skin to prevent things like stains, paint, or any other finishes from penetrating that first layer. It’s such simple protection if you keep a pump bottle in your shop like I do. Oh and don’t worry, it doesn’t leave your hands greesy.
After letting the coat of finish dry, the only thing left to do was remove the old boring shelf and install my new custom one. I know it’s a little unconventional but there are enough flat surfaces to hold the items I like to store over here, which include a speaker, glasses, clutches, and keys. I only placed hooks on one side to keep the light switch in the area, clear.
Modern Wall Shelf Conclusion
We did it! You’ve built a modern wall shelf to help spice up your living space. I love how much stuff you can put on these.
If you liked this project, check out my website where I have a ton of building plans to help you with another project.
[Rewrite and expand the following content into a human-written, SEO-friendly article with a minimum of 1000 words. Never write less than 800 words. Keep all facts accurate. Add one comparison table if relevant. Return only the final HTML article without any explanations.
Let’s Build a Laundry Drawer!
DIY Laundry Drawer Plans
$9.99
Materials I Used to Build the Laundry Drawer
Step 1: Cutting Pieces for the Drawer
It takes 7 parts to make the body. So not many. If you would like a set laundry drawer plans with dimensions then I have that available, it also comes with a CNC cut file if you have a CNC. I personally painted my cabinets so I just used whatever 3/4” sheet material I had scraps of which is MDF in this case.
I start by laying the side pieces on their back and attaching what will be the bottom. When joining things together, it will be the same process on everything, I used DAPs weldwood wood glue then predrill and run in a screw
Step 2: Preparing the Toe Kick Plate and Attaching Laundry Drawer Sides
This ledge here will be where the toe kick plate goes in, which is this board here. I’m using it as a spacer to make sure the bottom is attached square. After using it to align the board from the inside, I also used it as a spacer to guide me on where to pre drill and run in a screw. Double checking that it worked; it did, so I continue attaching. I used this trick again when I needed to run in the center hole. As long as the board is flush to the front, it will indicate where the 3/4 material starts for the pre drill hole.
After attaching the first side, I attached the second side the same way. However since the toe kick now can’t fit inside to check for square, I just used a tape. I measured the top, then made sure the bottom matched before driving in my screws to attach it.
Step 3: Attaching the Toe Kick Plate
Next is to attach the toe kick, which should line up perfectly flush to both of the side pieces and the front and the back. Same with the back board that will make up the back of the platform once this cabinet is stood up right. Perfect, that is the bottom done so now lets flip this around, but still leave it on it’s back, and start working on the top boards. This board here will join the sides out on the back edge while also giving me a place to screw it into the wall later on when installing it in the space.
When joining something flush like this, I like to move my work piece to the edge of my workbench if possible. This way my drill has room to go in straight instead of at an angle where I could blow out a screw.
Step 4: Attaching the Last Board
The last piece to attach here is a similar board as the last but this one joins the front edge of the sides. Since I can’t use my workbench to rest it against, what I like to do is use a clamp to act as a third hand. These squeeze clamps are great to hold them in the general area while I get one side at a time perfectly placed and attached. This board will give me something to screw up into a countertop later when it gets installed.
Step 5: Adding the Back to the Laundry Drawer
Ok, with that attached, now let me spin this around, tilt it up, and just like that we have a cabinet. Oh, I forgot the back. Hold on, that’s a quick add. Lets just lay this thing back down, but this time laying it on it’s face. I made the back from 1/4” mdf as it doesn’t need to be super thick. 1/4” material will do a great job at holding it square and keeping it from racking.
You’ll see that my back is in two pieces. That’s because I’m using scraps and don’t care about the back, which will be on the inside and never seen, has a seem. If it does bother you though, you can always make it from one solid piece
Alrighty, and now that’s a completed body. So for now, lets just slide this on over to make room for me to bring in the parts to build out the inside drawer that will hold the hampers.
Step 6: Securing the Fit and Attaching the Sides
All of these parts are also included on the plans and cutlist but I grab for what will be the bottom first. I personally always like to make sure it fits within the body before attaching things just because I have been known to grab the wrong part before but once I made sure it fit, I attached the two sides which look like wings. These have dados cut into them for the bottom to slip right into.
This bottom will be locked in once the front and back are attached, but I went ahead and threw in a few screws. I went to the back and attached the specialty designed back. These slots and these predrilled through holes are needed for the under mount drawer slides that I’ll be using.
If you use my exact dimensions then you can not only use the exact hampers that fit in this laundry drawer but also the exact drawer slides. However, know that if you want to change dimensions then you’ll probably have to get different drawer slides and change the design of this back part. Another option is to change the dimensions to what you want, but then use side mount drawer slides and not worry about the under mount ones. Lots of options.
Step 7: Completing the Front Assembly
Going to the front of this assembly, I attach the large front panel. This might seem big and boring right now but you’ll see why the scale is needed. For now, let me go ahead and put it inside the body to make sure it all looks good……annnnd it does. It’s as simple as that, now everything here on out are finishing details.
Step 8: Making the Laundry Drawer Slide!
I could attach the under mount drawer slides to the bottom side of the cabinet. Looks like this here. Then go to the inside of the cabinet and attach the rails with screws. To connect the two, I could carry the inside portion over to the body, set it on the rails, then push it in until the two components clicked together. It’s so satisfying. Then since I’m making mine look like two doors and a top drawer, I crawled inside and attached these pieces to the outside by screwing them in on the inside while Jacob held them to the correcting spacing.
Conclusion: The Finished Product
It’s kinda hard to get a good angle of this cabinet because the space is really tight but without the counter top in place you can see how it works. Two hampers fit perfectly on the drawer so that you can pull it out and toss in your clothes, then hide them away again by pushing it in. Soft closed of course.
Even with the countertop on, I have plenty of room to take the hampers in and out or simply toss in clothes then reshut it. I love how it looks like three components. Where as the unit on the left really is a top drawer and two doors on the bottom.
I have a four part series of videos where I cover how to properly paint MDF, how to build custom cabinets, how to upgrade store bought cabinets, and also how to build a countertop from scrap 2x4s! So basically if you want to see how I built out the entire room you’re looking at, then check the links in the description. If you can imagine it, you can build it and I hope I’m an inspiration or guide to help you get started. I’ll see you on my next project.
Additional Things I Used to Build This Laundry Drawer
This Adjustable Liquor Cabinet is so cool! It’s a great hide-away bar, but also perfect for storage around the house. Let me show you how I made it.
Let’s Build a Liquor Cabinet
Liquor Cabinet Plans
$9.99
I’ve created a set of liquor cabinet build plans to help you get through the process of building this liquor cabinet.
Materials I Used to Build the Liquor Cabinet
Step 1: Preparing to Make the Moving Portion of the Liquor Cabinet
I made a set of liquor cabinet build plans with a cut list for the liquor cabinet build so I started by cutting the parts needed and milling them to their final dimensions. I labeled all my parts as I made them with a piece of tape so I could pull whichever part was needed as I was moving through the steps.
I’m going to start the assembly by making the shelf portion that will raise and lower with the bottles on it. I grabbed the four solid wood parts needed for the body of this shelf and laid them out. Paying attention to which areas would be seen in the final product and being intentional about the direction it faces.
For joinery on almost this entire build I’m using a simple doweling jig that Rockler makes. After lining up joining boards and drawing pencil marks across the seam, the jig can be clamped into place so that I can drill a hole to the depth needed. You based the depth of the hole off the length of dowels you’re using. There is a collar on the bit that allows you to adjust the depth easily.
This jig works well for boards that are flush with an end but it doesn’t work for boards spaced off the end. For those I used a home made jig and a second collar to make sure I don’t go all the way through the material. You could always do these free hand if you don’t feel like whipping together a jig.
Step 2: Assembling the Moving Shelf
With the holes drilled, now I can assemble it. Remember that you only have a few mins, around 3-5, to get things set in clamps. So I have everything ready; the dowels, a mallet, clamps, and all the parts. When using dowels I always place a small amount of glue in the hole then tap in the dowel. Make sure to not over hit it and distort it’s shape. Then I place glue in the mating part before setting it on the dowel.
If you move things to the ground like me, make sure to lay something down for it to rest on to not mar the surface. Once things were seated all the way, I set a few clamps on it until the glue was dry. Checking for square before walking away from it.
Step 3: Setting the Back of the Shelf in Place
While it sets up, I start drilling in the pocket holes for the plywood panel that will be the back of the shelf. Again, I looked at both sides before drilling any so that I could choose which side would be the final seen face of the final product. I don’t worry about using pocket holes here because it will never been seen. After drilling them all around the perimeter, I set it in place and use screws to attach it.
Then before calling this shelf finished, I add in one more piece of wood. This will later be what rests on the lift so I not only screwed it in place but also used glue. And that is the first big assembly of the build done. I set it aside and started working on the liquor cabinet body.
Step 4: Assembling the Liquor Cabinet Legs
I grabbed what will be the legs and cut in a small taper at the base to create a foot. I like to place an X on the two sides before making any cuts just to make sure my backwards brain doesn’t mix things up. Then I use the Rockler Tapering Jig which easily allows me to chop away the material not needed on two sides.
Ok, that’s the only part that needs something special before building the side assembly, so I grabbed my other parts and started assembling.
Glue Notes:
I always do a dry fit before applying glue. When I do apply glue, I do just a dab. To save on time in the end I actually sand all my parts before assembling them so I do my best to prevent glue squeeze out. A bottle is great for accurately getting glue into the holes but I use a chip brush to get glue on the edges. I also like to have a rubber mallet around to switch over to when things need more force to seat all the way.
If you only have a wooden one, use a scrap piece of wood on your board to prevent it from getting marred. Last thing to think about: you can drastically simplify this project by using pocket holes as the joinery method instead of dowels.
After I made the first, I repeated by making a second side the same way, then also put together the assembly that the lift will later rest on.
Step 5: Joining the Sides of the Shelf
Once dry, I continued building the liquor cabinet body of the cabinet by joining the sides. It is very easy to get things mixed up (it’s a lot of square parts), after I did a dry fit I set out all the parts in their given position and orientation. This way as soon as I started applying the glue I could just run through it.
The first step is pretty easy, applying glue inside each dowel location then tapping in the dowels. The second step is also pretty easy, apply a little glue to the ends of each part and tap it into place. The third step is tricky. There are 14 dowels to get aligned all at the same time and this needs to happen quickly before the glue starts drying. Honestly, it went pretty dang smooth. It’s always a good feeling when things seem to be working. I turned it sideways, complimented it, but then set it in clamps for a few hours to dry.
Step 6: Preparing the Panels for the Other Sections of the Liquor Cabinet
While the body is drying, you can stay busy by cutting all the plywood panels that will go in the different sections. I have all of these on the cut list in my liquor cabinet plans but I cut all of them oversized to start so that I could wait until the body was done and get an exact measurement on what each one needed to be. I again considered the final look I wanted on each panel so I could cut it just so.
To secure these in place, I drilled a few pocket holes on the inside face. Something I do when going into hardwood like the legs here is predrill through the pocket hole to prevent splitting once I run in the screw. It adds time, but nobody wants to split a component at this point.
Step 7: Installing the Center Panel
After getting both side panels in, I repeated with the center panel. This one is slightly tricky because there is no lip for it to rest on. So I grabbed some scrap wood that was the correct height so that I could set the big panel in place while I secured it around the perimeter. I flipped the unit over in order to have better access to the underside to secure the next two panels in place.
Clamping Tip: Clamp a scrap board to the underside of the rails so you do have a flush surface to rest the panel on while securing it.
For the middle shelf, not only is it a slight puzzle to get in…first the shelf, then the clamp can go on, but then I also had to switch to a right angle attachment because of the tight squeeze….but hey! It all worked in the end.
Alrighty, lets flip this liquor cabinet back over and see the progress. My gosh this thing is heavy. Hickory isn’t messing around!
Step 8: Splitting the Top Cubby and Prepping Door Hardware
Up top I put in a few boards that will later give me a surface to attach some door hardware, then I also split the top cubby into two by adding in a center divider. With that in, it’s time for me to work on adding in the rising/lower shelf portion of this build.
I moved back to the shelf assembly I started this build off with and first added in some threaded inserts into the back panel. I did this by counterboring some holes the size of the inserts, then using an Allen to screw them in until flush. The placement of these inserts go with my exact lift, which is a unit made by Progressive Automations. It’s actually marketed as a tv lift so if you wanted to sub this liquor shelf for a TV, you can easily use the plans for a completely different function.
The lift is easily secured down into the support members of the body, then I placed the final back panel in so that I could go to the inside and trace the hole locations with a pencil. After punching through with a drill bit, I could set it back in place then secure it to the lift with bolts. Then go around the boarder and screw in all the pocket holes, making sure the panel was flush.
Step 9: Testing and Adjusting the Moving Pieces
This is the first moving part to test out to make sure things look like they are working and I was very impressed with how quiet it is. What I did was extend the lift all the way up right now, I’ll set the limit later. This way I could grab the shelf and set it on top, using that lip I created earlier, to rest it in place while I secured it with bolts through the threaded inserts I place in the shelf. Then I did the second moving test, which was muuuch more suspenseful. Haha, did I do everything correctly for this shelf to fit inside the body? Lets see.
That front corner rubs slightly but that’s an easy fix. Let me show you the unit from the front as this is where it gets even more exciting. With the body and the shelf working well together, now I need to add on the top but in order for the back to raise and lower independently, I need to have two sections for a top. I start by being selective on wood and grain to come out with the look I will love for the top pieces, and cut it down to size at the table saw. This front section will be fixed in placed, however this back section will be floating and have a small space between the two.
Step 10: Fixing the Front of the Liquor Cabinet
Lets work on fixing the front of the liquor cabinet first. I put an even reveal on all three sides so I used a combination square to make sure it was uniformed, you can see I used a clamp to pin that corner once it was good while I work on adjusting the other side but then I could pin it in place from the underside with pocket holes I drilled in the stretchers before building the frame of the body.
Once that was fixed, I worked on the floating one. This was an experiment, wasn’t sure if it would actually work. What I did was set a collar on a drill bit then counterbore into the body. Here the depth doesn’t really matter, but straightness does. Next, I thread in some screws. I picked screws that had a decent amount of threads but then an unthreaded portion near the top so that after I threaded in the body, I could lop the heads off. I used a grinder for this.
My intention is to create four pins sticking out of the body. I transferred these pin locations to the underside of the floating top section and counterbored more holes. These are just slightly larger than the pins I just placed. The goal is to be able to set the top in place and it not struggle to go on. That’s success one, but success two will be if it goes down without interfering with the fixed front, lets push buttons.
All the successes! Everything works and it feels great. This lift is not only quiet but it’s so stable and smooth on the launch and the landing in both directions. I do have a 5% discount code on the lift columns if you’re needing a lift for an upcoming project. I set the upper limit so that the bottom of the shelf will land flush to the top of the top.
Step 11: Mounting the Liquor Cabinet Doors
I was so happy with how the project worked at this point but I had one more big section to tackle before I was in the clear and that my friends is mounting the doors.
When planning this liquor cabinet project, I wanted a piece of wood that had a ton of contrast, character and visual BAM for these drawer fronts. As you can see, I found the board for me. I waited until this point to cut them so they would be exact to my openings and so I could make it have continuous grain from left to right.
I started by using the Rockler jig again to put a few dowels in that center partition so that I could glue on the portion of solid wood that would cover up the edge. Next I could start attaching the hardware. The right cubby will be a drop down door so I placed two non mortise hinges on the bottom and a catch on the left.
Step 12: Opening the Drawers with a Push
For the catch! I installed something I think is super cool. It’s two parts, here is the body, then here is ball that fits into it’s jaws. When pressed, the jaws close around it. When pressed again, the jaws release it…I took that and turned it horizontal and installed it on the underside of the drawer opening. The tricky part here is getting the depth correct so the door comes out flush to the reveal you’re aiming for. Which in my case is flush to the center partition. I’m dyslexic so any time I get math correct on the first go, I’m super proud and want everybody to see.
I love this mechanism because it means I don’t need to clutter the front with a drawer pull, just a simple push of a finger will open or close the door.
I could have done another drop door on the left however for fun, lets change it to two swing doors. These hinges are mounted on the sides instead of the bottom, then more math to get the hungry hippo openings mounted properly.
Ah. I showed you when I won math, so I’ll show you when I lose. No problem, the hardware is very simple to adjust. Since the left was correct I used a combination square to get the right one set to the same depth. Now lets try that again. That’s more like it!
Step 13: Finishing Touches! Coating the Liquor Cabinet with Wood Finish
Whew, how incredibly satisfying guys! I’ve had this idea for about two years now but I can add things to my list way faster than I can build them, so to see this cabinet complete and working so fabulously, I was on cloud nine. Remember I have a set of plans with all my dimensions, a cut list and even a material shopping list if you’d like to build your own.
Alright, the liquor cabinet build is complete at this point so lastly lets wrap this up with a coat of finish to make it pop and protect it. I am going with one of my favorites which is Gleam by Total Boat. I’m going to go with a three part mash up, where I first apply a coat of Gleams wood sealer. This layer fills the grain, seals wood fibers, and levels the surface to make for an ultra smooth finish.
After I let that dry for two hours, I move on to step two which is Gleam 2.0. I actually want a satin finish as my final look but if you want either a satin or matte final you need to use a Gloss to build up a few layers first. So I laid down three coats of the gloss, waiting an hour in between coats. This stuff dries very fast and evenly so it’s easy to knock out multiple coats in a single day.
Once I got to coat four, I switched over to the Satin. If you’re curious, if you use matte or satin to build up the layers then it can sometimes create a cloudiness. So always use gloss for the build up then use whatever sheen you want as your top layer.
Liquor Cabinet Build Conclusion
When the finish was dry, I moved the liquor cabinet into the house and put everything back together. And wow! What a difference! The table I had here before, was actually one of the first things I ever built but my biggest complaint is I think having all the exposed bottles and mixers on top is just messy looking. I much prefer the prohibition style where it’s sneaky and hidden until you want it exposed.
The Progressive lift comes with a remote on a wire that I velcro to the right side so it’s hidden. With a simple push of a button, the bottles can be raised up. As you can see the lift is so smooth and stable that there is no problem with things moving around and getting broken. I can even place nit nacks on top. In the cubbies I have storage for mixers, accessories, glasses, or even a nice decanter. I love the opening and closing hardware of these doors. Very fun.
I really hope you enjoyed this liquor cabinet build. Don’t forget I have a set of plans, not only for this project but for many others, over on my website. I’ll see you on whatever I’m tackling next.
[Rewrite and expand the following content into a human-written, SEO-friendly article with a minimum of 1000 words. Never write less than 800 words. Keep all facts accurate. Add one comparison table if relevant. Return only the final HTML article without any explanations.
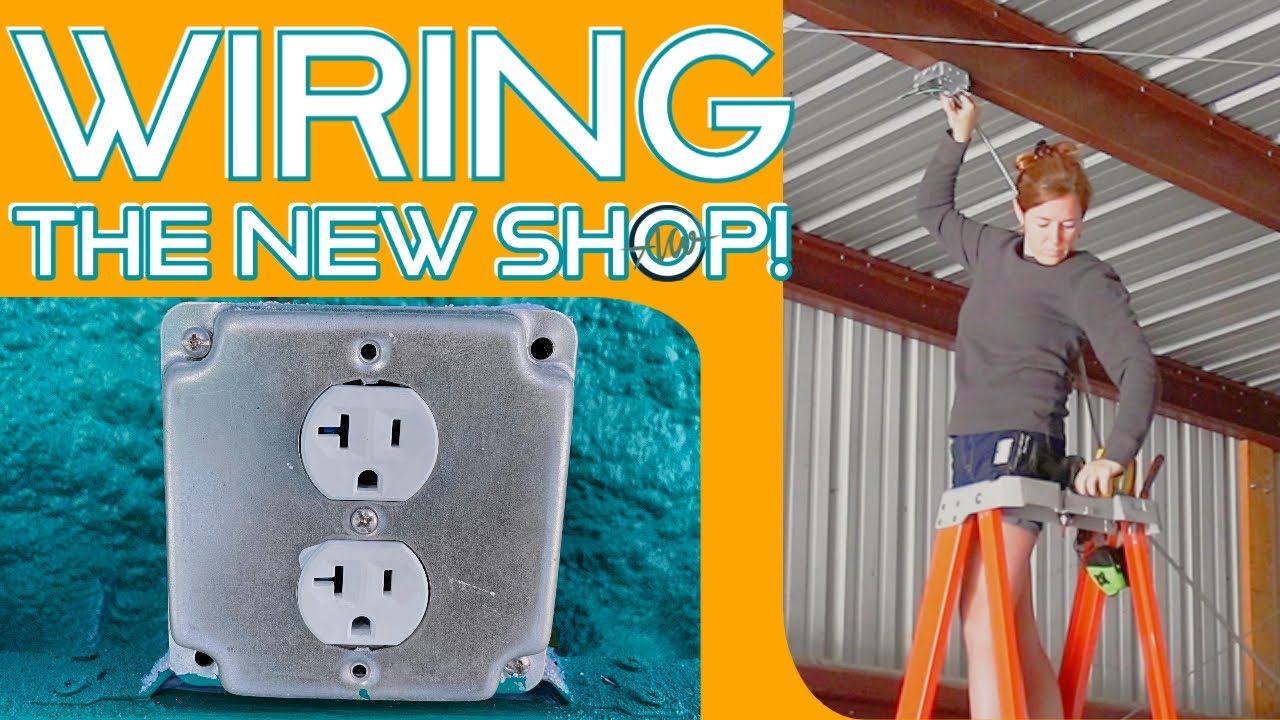
Today I’ll show you how to run power to a shed. I’ve done quite a few electrical videos, so if you need any other tips, check out my website!
Step 1: Locate the Breaker Box and Drill a Hole for an LB
This process could be use for anything in your yard that you want to get power to whether it be a pool, or an outdoor kitchen, or even a yard feature like a pond. Just consider if you have enough space in your breaker box and of course all your local codes. I’m comfortable tackling this project on my own, but if you’re not then there is never in any shame in hiring a professional. Lets go ahead and get started.
The first thing I need to do is locate the breaker box so that I can figure out a path to get to the outside of the building I am wiring. Quick change of scenery here but this is the outside of the wall I was just referencing. I’m using a hole saw bit the size for an LB fitting to go through.
Step 2: Placing the Conduit
To get to the inside, the piece isn’t even all the way through the wall. So, you can just cut a piece of conduit to get you all the way through. Know that they do make a different cement for electrical conduit instead of the regular PVC one that you’re used to. I’m going to be adding in an outlet so I’m going to be adding a straight piece of conduit and then put my outlet up high so that it’s easy to access. Then from the outlet I’m going to be going into another straight piece of conduit that will go down into the ground from the outlet, then go into a 90 degree fitting.
According to code, the sharp edge on the conduit is still too sharp. To get around that, you need to put on a male fitting to protect the wiring. After gluing the joints together, I secured the outlet box to the building, then also placed a strap near the bottom. A great thing about conduit is the flex it has so I used my boot to push it into the building as I was securing it.
The purpose of an LB is so that you can go around a tight corner in two steps rather than one, meaning you can take off the back, pull through your entire amount of Romex and then feed it back down. You can make this tight corner really easily.
Step 3: Trenching to Code
Okay lets talk about material you’re going to need for going in the ground and the depth of your trench. It all correlates to one another. In my case I am using a PVC conduit but if I were to use metal conduit I can get away with (by code) only going 6 inches into the ground. I didn’t want to deal with bending or anything like that so I went with PVC conduit meaning that I have to go at least 12 inches into the ground.
The minimum depth of my trench has to be 12 inches with the stipulation that a GFCI needs to be on the circuit somewhere. That is the reason I am adding an outlet. Not only is it handy to have outlets anywhere you’re going to be doing electrical work but it also means I can go the 12 inches whereas if i didn’t add a GFCI the minimum I would be required for my trench is 18 inches.
Just be aware that there are stipulations on how deep you have to go with your trench depending on what you’re using.
Step 4: Feeding the Power Line into the Trench
This line coming out is my Romex that’s coming in from the breaker box but now I’ll be feeding in my direct power line which is rated to be buried directly in this trench. I’m trying to feed it in with my right hand and pull it through with my left and I’m using my boot to keep the pipe down.
I fed through enough power line to go down the trench then whatever length to get me to where I would install my first outlet. Now that I have my wiring over here it’s the same song and dance. You need some sort of hole to now get you through to the inside for a LB to fit, again stubbing through to go all the way to the inside. From here, you have a straight piece of conduit and this will all be glued. Down here I’m going to have another 90 with that fitting in order to make sure that it meet code. Once you glue it up then you can feed it in.
Step 5: Securing the Power Wire and Closing up the Trench
A little prebend goes a long way. Also note they make lubricant for chasing wires and it really does make it easier. Again, taking off the back of the LB to make chasing this wire up and in quick and easy. I attached another clamp to the bottom of the conduit then buttoned up the back and called this project done.
Well, other than filling in the trench, which is the easy part. There. Like it never happened except it did.
I hope that you enjoyed watching this project, I’ll leave you a link in the description to the many other electrical videos I’ve done incase any of those are useful for what you’re doing. This is how you run power to a shed.
In this video I’ll be building this outdoor storage bench. It’s at a nice comfortable sitting height but the lid is on a hinge so that I can stow away the cushions when they are not in use. This is a quick one day project so if you are needing a storage trunk for something then know I have not only a CNC cut file for this one but also step by step plans that come with a material list and a cut list. Let me show you how it all goes together.
Let’s Build an Outdoor Storage Bench!
DIY Storage Bench Plans
$9.99
You can go a lot of different ways for material for this storage bench but I went with an exterior rated MDF called Armorite. I know, I know, it’s typically a cardinal rule that you can’t use MDF in situations where it could get wet, as standard MDF swells and is forever ruined. Just look at how much that expanded? This Armorite is not only moisture resistant but is also treated with zinc borate to resist rot and termites. plus it machines so clean compared to standard MDF, this is straight off without any sanding.
I’ve created a set of build plans to help making building your outdoor storage bench simple.
Materials I Used to Build the Outdoor Storage Bench:
Step 1: Organizing Storage Bench Parts and Pre-Drilling
I first organized my parts on one of my work areas before getting started. To start the storage bench assembly, I first join together the front to one of the sides. Since this project will be going outside, I’m using an exterior wood glue on all the joints then pre drilling and running in a screw. I place my pieces near the end of my workbench so that I don’t have interference with my drill when pre drilling. After getting the first side connect, I repeated to connect the other.
Step 2: Placing the Bottom Between the Storage Bench Walls
Now before attaching the other side, I’m going to slip in the bottom, this should fit perfect between the two short sides. Once in place, I run around the three sides and add in screws to attach it. With that done, now the final fourth side of the box can be added in the same way. Nice and easy. Keep in mind that I’m making mine for outdoor but you can make yours into a end of the bed bench or a keys toy chest, or anything where you need decorative storage.
Step 3: Adding Legs to Get it off the Ground!
The storage bench body is done. Lets add some legs to it. Everything is made from Armorite and to distinguish the legs some, I took all the pieces to the miter saw first to cut in a slight angle. Now they can be added to the body. Two pieces will make up the leg, one is narrower than the other so that both look the same width once they are attached. I’m using wood glue once again but now switched over to using 1 1/4” brad nails instead of screws. In order for the legs to come out looking the same width, they need to be attached properly. Meaning the small side needs to be placed on first.
Well while I’m fixing my mistake I might as well show you a tip to remove brad nails. Instead of clipping them, which never leaves them perfectly flush, I like to pull them out on the backside. I do this with the large set of Crescent’s square nose pliers. I get a good grip on it then roll the nose so it pulls the nail up straight. Sometimes it breaks, but it’s easy to get another grip and pull it the remainder way.
Step 4: Placing the Side and Decorating the Body
With the short side in place, now I can butt this one right up flush and everything will come out looking correct. Another way you can do it is by placing the unit on it’s head, yeah actually this way is much easier, as you have the workbench as a reference point for both of them instead of holding one up while trying to get it flush to the top.
Lets stand it up and take a look. Yes, perfect.
Noooow, lets tilt it back down in order to decorate the body. I’m going with a lap siding look. This is very easy to achieve. You can start off with a small strip piece down at the bottom, this will create a bump off for the first siding strip. For everything on this step I’m using a little bit of wood glue and brad nails.
Actually, I’m going to go ahead and lower this to the floor as it’s just high enough to be annoying….or maybe I’m just short enough. This will be much easier to see and use my nail gun at this height but now I just need to grab one of my rolling around stools.
Step 5: Attaching the Long Sides
Ok to start attaching the siding, this goes quick and easy. I laid down the first strip so that it’s flush with the trim piece below. From there, each strip is cut to fit in between the legs so that’s easy to get right but the overlap amount can vary. To make sure they all come out consistent, I cut a spacer. Now I just have to line this spacer up to the bottom side of the previous strip then nail it in place. I move this spacer over to the right and repeat. Then to the center and repeat.
With it stuck in place, I throw in a few extra ones in between before moving on to the next and repeat the process again. When you’re shooting in brads, keep in mind the over lap that each board will have and make sure to place your brads in this zone. That way the next board you lay down will cover up the nail hole. Oh I don’t know if I mentioned before, but the entire body is made from 3/4” but the slats I made from 1/4”. Armorite comes in varying sizes, I’ve even used 1” before on projects.
Something else to talk about on this step is adhesive. There is just a corner of the slat making contact to the body so you can’t use wood glue. You’ll want to switch to construction adhesive and my go to for projects is DAP Dyna Grip. It’s rated for interior or exterior and a small bead in a few places under each new slat works great.
Step 6: Attaching the Short Sides
After I got the long side complete, I flip the unit up on end and repeated with the short side. That’s another distinction with Armorite it takes brad nails so much cleaner than standard MDF. You don’t get that mushrooming and chipping.
Now, down we go and lets have a look. Well, that is pretty darn cute. And so quick!
Step 7: Placing the Top of the Storage Bench
Lets keep the momentum going by adding the top. For my lid I went with a plane slab of MDF because I plan to have cushions on it for sitting. But know you could always cut in a cool patten or make it look like individual boards like I show how to do on an outdoor cabinet. I’ll link that for you below. I line up the top to the body so that it’s flush on the back then pre drill and attach the hinges.
Step 8: Painting the Storage Bench
Worked like a charm. Note that I didn’t add a handle or cut one in because there is a built in lip that’s easy to grab all along the front. Let’s break all of these edges and get ready to throw a coat of paint on it! I actually did an entire video on how to properly paint MDF so I’ll link to that below if you’re interested. You can definitely roll or brush on paint, but since I have an HVLP, that’s what I used to really get in all the nooks and crannies, easily.
After letting it dry I moved it into place and tested it out. Since I knew I would be sitting my bench up next to the house, I left the lid as is, but another option is to add a chain to catch the lid from opening too wide if you are placing it somewhere without a wall. I can sit the cushions in place, but then when I want to stow them away, I can simply open the lid and put them in until next time.
All in all, this project only takes about two hours to complete once the parts are cut. So it’s nice and simple but will create a decent amount of storage for a variety of different spaces. Remember that I have a set of plans and a CNC cut file if you’re interested in building your own.
[Rewrite and expand the following content into a human-written, SEO-friendly article with a minimum of 1000 words. Never write less than 800 words. Keep all facts accurate. Add one comparison table if relevant. Return only the final HTML article without any explanations.
This all started because I wanted to be able to hit golf balls off my off my porch. I thought I’d build a tee box. That turned into if I’m gonna go through the effort I might as well extend it out some that way I have room for a grill and a nice table and chairs for entertaining. That turned into “I should add a little bit more so I can put in a pool. As you can tell it very quickly snowballed.
Let’s Build a Deck!
Materials I Used to Build a Deck
Wood
Nails
Saw
String Line
Nailer
Wood Tape
Pro-wood Lumber
How I Chose Materials for the Deck
I’ve personally chosen pro-wood for all of my pressure treated. Needs. They not only have super high standards, but they are also used in the latest technology called MCA where the C stands for copper. I love this because that means that it’s not harmful to plants, people or pets. But it is harmful to microbials that cause rot, or fungi. The treated lumber does come in levels of treatment so choosing lumber can get tricky, but pro-wood has black end tabs that make it easy. Whether you need light duty, ground contact, or something else.
Step 1: Preparing the Deck Posts
Lets start off with showing you the before shot. Everything here was in pretty decent shape other than the staircase but I’ll get into that later so all I did was remove the railing and refinish what was there that I could start building onto it. The framework for any deck is comprised of four main components: the posts, the beams, the joist, and the deck board. We start with setting the posts. Different areas will have different depth requirements for how deep you have to dig your hole so be sure to check with your code before getting started.
Next I put on a post saver sleeve. I do not put a post in the ground without one of these guys. What you need in order to create rot on a post is moisture and air, and where the post is most susceptible is about two inches above ground level. The line here indicates this goes two inches above where the ground level is and this will protect this zone that I most susceptible to rot.
The inside of it is lined with a tar like feature so that it creates a water and air tight seal to prevent oxygen from having access to the post. The sleeve takes heat to shrink it perfectly to size. I used my propane torch while somebody else turns it. It only takes a few seconds, then I cool it with a roller dipped in water.
Step 2: Pouring Concrete to Secure the Posts
If you have a large job like this one I personally think its worth it to rent mixer so that you can do three bags at a time. Remember to slope the concrete away. You don’t want to create an area that more water can pool.
Let me give you guys a tip on using a string line to set post. A lot of times when you see people pull a string line they pull it and then they try to set the post up right next to the it, the problem is if you end up bumming it too much even sightly with one post you’re gonna knock the string out of alignment. What I recommend instead is moving the string line away from it, in this case its going to be 18 inches so that whenever you set the post you can then pull your tape measure set the tape and hit that mark.
Alright so that is all of the posts set, lets move on to cutting them to height so that we can set the beams.
Step 3: Cutting the Posts to Height
So this line comes from using the laser level on all of the posts. Once you get the face mark now you can translate that around using the speed squarer. My favorite speed squarer to have on site is this crescent one that goes not only from a 6 inch but has a very quick flappable ruler that goes to a 12 in extension.
For all of the framing I’m using pro woods pressure treated wood and more specially for the post I’m using their label that says “for in the ground”. I’ll tell you more about their laboring press later. Jacob is now going through and marking off all of the shoulder locations. These headers are going to be attached to an actual shoulder so that they’re resting on a notch out on these beams so he’s just using a speed square to mark the depth.
The thing with making these shoulders is that the circular saw is not going to have enough throw in it to do it all in one. You can use the circular saw and set the depth in order to make this face cut to where it doesn’t go past your shoulder, in our case it can be all full depth without going past it but then make all of the cuts around here and as jake is going through doing that, I’ll come back and finish it with the saw. That wraps up cutting in all of the shoulders. The next thing is to cut all the beams to length to set on the shoulders.
Step 4: Setting the Beams
These are already crowned you can go through and crown your board and then whenever you find where the curve is you put an arrow on it so whenever you set these in pkae you can make sure it’s facing up. This one is gonna go halfway on this post. I’m going to come back with screws but for now I’m just gonna pop in a nail.
For the beams I’m using adoubled up 2 by 12. You want thse boards to be as untied as possible for strength so that means sucking them together. I first used three inch spacks power lags to pull the cup out then I came back with a framing nailer to nail it all throughout. This was my first job using the Senco framing nailer and I was very impressed with how rapidly it fired off.
At the end of setting al the beams in place it looks a little something like this.
Step 5: Mounting the Joists
The next step is to set the joist. Often you see joist go in hangers and are mounted on the face of the beam, but in this case they will be mounted to the top which first means I need to go through and flatten the top of the beam. A chalk line comes in handy to give a visual on the high points. Next I used an electric planer to flatten the top. Since the job site was sloped the lowest beam was pretty easy, the middle section as a shoulder workout, but the far beam was way too above my head.
Tip: if you don’t have planer than another option would be to use a fence or a circular saw to make the top perfectly flat
Step 6: Setting the Joists
Lets start with the third major framing component: setting the joist. At the very beginning I ended up demoing the rim joist that use to be here so that we could have access to the joist from the existing deck and sister on these boards to them instead of going with joist hangers on the rim joists. By doing it this way, we’re not gonna have to cut to height each board, we’re just let it run wild into there, but we do have to notch it to get a 2 by 10 made up to this 2 by 8. On the opposite side, Jacob just set it right on top of it and this should come out level.
Whenever you’re deciding how many joist you want you can do either 24 inch centers, 16 inch centers, and you can play with doing 2 by 8s or 2 by 10s. actually with using 2 by 8s and 2 by 10s I could’ve gone to 24 inch centers but I made a decision to go with 16 in order to not make it so spongy feeling. The cost is very little difference so I would recommend sticking with 16s.
The complication here is making sure what we’re doing is going on square to the other surface, so we’re actually going to hop to the last one so that we can then pull diagonals and make sure the structure we are putting in is square. So out at the beams, I’m gonna have to toenail in the joist.
Tip: take off the tip of your nail gun This is really good whenever you’re in bump mode or nailing on flat but if you’re gonna be toe nailing and you’re going to take this off, they give you spikes in order to go in at an angle without it moving around on you.
The two measurements that I’m really paying attention to here in that these tails are the exact length apart and then that these are on 16 in center.
Step 7: Day two! Finishing Setting the Joist by Spacing them Evenly
So whenever setting joist, at the very last step you should attached a rim joist that connects the tails of each one. Its important to get the overhang of each joist as exact with each other as possible. So whenever measuring these 16 on center you never wanna go from the top because they’re not secured there, so you want to go from the bottom and then what I love about this tape is it has the numbers on both sides that makes measuring from the bottom very simple.
Step 8: Taping the Joist
Before doing anything else I want to do the joist taping which will drastically prolong the life of the boards. The tricky thing about my particular situation is the ground is so uneven I would have to move the ladder five or six times per joist, to prevent that I ended up doing some sort of leap frog activity where I used two 2 by 8s as seats and then just alternated them a little bit as a I worked my way back with four or five pieces of tape at a time. I’d progress the first two feet, move my board back then move my board back and progress the next two feet until I got to the end.
Now on this joist tape you do want to wrap it around the end and cover up the end grain which is where the wood actually absorbs the moisture.
Step 9: Completing the Deck Frame by Adding a Rim Joist
As Cindy and I were tackling the joist taping, Jacob was finishing off the last of the framing members for the pool. This is the only portion of the deck that includes joist hangers. For this we are using a Senco Nailer made specifically for joist hanging.
The last thing we do to conclude framing is add on the rim joist. This it the board that will tie all the tails of the joist together. Another important thing it does it plumb the joist. With the joist you always start with the board on one end and progress to the other end of the joist one at a time. As you go one person should be making sure that the top of the rim joist is not only flush to the top of the joist but that the joist is also at a ninety so that it can be nailed at the top and the bottom. It’s easiest with two people on this job.
I check with a speed squarer to ensure it is flush and will push or pull it if it isn’t. If the joist is twisted then I use a crescent hammer with a spur on it to grab the joist and use leverage to twist it straight while tell Jacob “top” so he knows he can stick it.
Deck Framing Completed!
And that is going to wrap up the first video of the deck series. I really hope you enjoyed it as much as I enjoyed building it. But stayed tuned because I have plenty more deck to build and I’ll be bringing you along on the entire journey. In the mean time, feel free to check out my website for tons of project plans and templates. Until next time!
(BPT) – Homeowners seeking transformative bathroom renovations may be surprised to learn just how accessible it is to realize their vision. Current trends topping the list in bathroom design this year include greater design personalization, handcrafted home materials and a more cohesive overall design. All of these are possible to achieve with the help of Kohler® bathroom solutions.
Explore these options to help you shape a vision for a bathroom that feels as elevated as it is functional, creating a look and ambience that expresses your sense of style.
Personalization through design
One huge trend shift in 2026 bathroom design is away from a minimalist approach and toward a more personalized aesthetic. Consider this space as an opportunity to explore a look uniquely your own, instead of making your bathroom look just like everyone else’s.
To help you create the look you want, Kohler® makes customization easy by offering Mix & Match faucets. You can select your own combination of spout, handle and finish from these three distinct collections with different style expressions — traditional, transitional and modern — for over 50 possible combinations:
Components® lets you elevate your bathroom space with bold sophistication, where strong lines meet smooth forms to create faucets with a distinctly modern aesthetic. New York-based designer Cara Woodhouse selected Components® faucets as a feature in a recent home renovation.
Occasion® is a sculptural collection where pentagonal accents and mod shapes come together to create faucets fashioned to be the center of attention.
Artifacts® captures the charm of turn-of-the-century homes, using vintage silhouettes and elegant details for a look that never goes out of style.
To create your unique look, simply:
1. Choose your spout: Select from a variety of shapes and sizes, as well as deck- or wall-mount options for a design to anchor your space. 2. Choose your handles: Pair your faucet with a range of handle options including lever, cross and industrial styles. 3. Choose your finish: Select your desired tone (polished, brushed or matte), that you can elegantly coordinate or unapologetically contrast with accessories, lighting and showering components.
Sustainability and craftsmanship
Another trend that’s continuing to gather steam is prioritizing sustainable materials and methods. Combined with concern for the environment, this trend also favors design elements that are well-crafted rather than cookie-cutter or seemingly mass produced.
If this trend speaks to you, consider a WasteLAB® DemiLav® rectangular vessel sink when you’re planning your next bathroom upgrade. Each sink is made with at least 70% recycled materials sourced from manufacturing waste streams. Handcrafted by artisans and American made, these sinks are made in small batches, creating natural variation and individuality.
WasteLAB® DemiLav® sinks are designed to balance sustainability with high design, offering a unique, expressive focal point. Each sink brings craftsmanship to your bathroom, with a refined, elegant design featuring a deep, symmetrical basin with rounded edges. These sinks meticulously transform repurposed industrial materials into sophisticated and luxurious centerpieces, without compromising sustainability.
Cohesive bathroom design
Another way to elevate your bathroom’s look is by creating an overall cohesive design, a trend that can be achieved using repeated colors through color drenching — even using the same color for walls, trim and ceiling — to unify the look of any space.
For a truly cohesive bathroom design, the Kohler x Studio McGee Claude collection offers an authentically timeless full-suite collection including toilets, sinks, vanities, mirrors and baths that are all designed in a modern classic style, though inspired by historic details. Designed to create a coordinated aesthetic across the entire space, this collection blends timeless design elements with modern performance. The Kohler x Studio McGee Claude collection uses architectural detailing and classic forms for a modern yet enduring look.
Within this collection, you can choose from three different bathroom sink options (console, pedestal and undermount) to tie powder rooms, guest bathrooms and primary bathrooms together in a home without over-repeating.
Customizing your home so it’s uniquely your own, with sustainable options and cohesive spaces, is a goal you can make happen, with the right approach and products meant to inspire.
For whatever direction you want to go with your next bathroom transformation, explore all the possibilities at Kohler.com.
[Rewrite and expand the following content into a human-written, SEO-friendly article with a minimum of 1000 words. Never write less than 800 words. Keep all facts accurate. Add one comparison table if relevant. Return only the final HTML article without any explanations.
(BPT) – When you’re building a new home or remodeling your existing one, there’s no shortage of choices you have to make. Most homeowners focus on visible features like kitchens, flooring and smart technology. But there’s one system that matters just as much, and it’s hidden behind your walls. That system is your home’s ventilation.
Why does ventilation matter?
Think of your home’s ventilation system as its lungs. It brings in fresh outdoor air and removes stale indoor air. Good ventilation means fresher air throughout your home, better moisture control, and fewer odors and indoor pollutants.
Every home needs proper ventilation. Whether you live in a cold northern region, a hot and humid southern state or anywhere in between, proper ventilation keeps your home comfortable, healthy and structurally sound.
Here’s where traditional ventilation systems often fall short
Modern homes are designed to be super energy-efficient, which means they’re sealed more carefully than ever before. The downside? That same seal that saves on your electric bill also traps stale air, humidity and cooking odors inside. Traditional ventilation systems work with a one-way approach. Some pull air out of your home and hope fresh air seeps in through cracks and gaps. Others push air in and hope stale air escapes the same way. Neither approach works well in today’s airtight homes.
The result? Uneven comfort, excess moisture, condensation on windows, lingering cooking odors, and a buildup of indoor pollutants from everyday activities like showering and cleaning. It gets worse. Exhaust-only systems can create negative pressure, allowing moisture and contaminants to seep into your walls. Supply-only systems trap moisture inside, increasing the risk of mold and long-term damage to your roof, walls, foundation and insulation.
Why balanced ventilation with an ERV is the solution
Energy Recovery Ventilators (ERVs) continuously bring fresh outdoor air into the home while exhausting stale indoor air. And it does something traditional systems can’t. It transfers heat and moisture between the incoming and outgoing air streams. As energy codes continue to evolve and builders construct tighter, more efficient homes, balanced ventilation is becoming an increasingly important part of residential design. So, how can you ensure your new home provides the ventilation you need for good indoor air quality, long-term home performance and year-round comfort in any climate? The key is balanced ventilation powered by an energy recovery ventilation (ERV).
One example of a balanced ventilation solution is the Panasonic BalancedHome® Elite+ 210, an energy recovery ventilator designed for modern single-family homes. The system delivers what modern single-family homes need by:
Helping maintain indoor comfort while reducing energy loss
Filtering incoming air to support healthier indoor environments
Allowing homeowners to monitor system performance
Offering installation flexibility for different home designs
Operating quietly in living spaces
A modern home deserves modern ventilation
As homes become more energy-efficient and airtight, ventilation is no longer optional. It is essential for your family’s comfort and long-term home performance. Homeowners who prioritize balanced ventilation can enjoy fresher indoor air, improved comfort and greater confidence that their home is performing as intended.
To learn more about the benefits of balanced ventilation, ERVs and why a new home isn’t complete without it, visit BalancedHome® ERV – Elite Plus Models – 210 | Panasonic North America – United States.
*BalancedHome® 210 performance may vary based on installation, operating conditions and climate.
(BPT) – At The Home Depot, the goal is to be a one-stop shop that helps Pros manage and grow their business — but running a business means fueling the teams behind it.
A Pro’s workday doesn’t start in the lumber aisle. It starts at 5:00 a.m. with a full tank of gas and a coffee on the road. It hits its stride during a working lunch on the back of a tailgate. It demands gear that can tackle the toughest job site. It wraps up with back-office tasks like invoicing and payroll.
That’s why Pro Xtra, The Home Depot’s loyalty program for Pros, launched partner offers designed to reward members everywhere their workday takes them. This new Pro Xtra benefit is kicking off with trusted, national brands including 7-Eleven, Jimmy John’s, Tecovas and Rosie’s AI Answering Service.
“True partnership means understanding everything it takes to keep a Pro’s business moving,” said Molly Battin, senior vice president and chief marketing officer for The Home Depot. “We’re continuously evolving our Pro Xtra program to deliver meaningful benefits that help Pros save time and money so they can focus on supporting their teams and customers.”
Powering the Pro’s Entire Day
The Morning Pit Stop — Fuel & Fleet (7-Eleven): A contractor’s day starts early. Before the first blueprint is unrolled, Pros can start the day fueling up their trucks and keeping their crews moving with special fuel discounts and app-exclusive fuel deals to reduce everyday commercial transit expenses.
Offer: Get $0.25 off per gallon (up to five fills)
The Tailgate Lunch — Food & Beverage (Jimmy John’s): When lunchtime hits on a busy jobsite, keeping crews energized and sustained is priority number one. Pros can easily buy a round of lunch for the entire crew without missing a beat.
Offer: Save $20 on orders of +$100
The Jobsite-to-After-Hours Uniform — Lifestyle & Travel (Tecovas): Supporting the Pro on and off the clock means providing gear that survives a 10-hour workday of grit and mud while maintaining comfort for once the job is done. Members unlock access to durable, premium handmade work boots built to outlast the jobsite without sacrificing professional style.
Offer: 20% off Tecovas work boots
The 24/7 Jobsite Admin — Business Management (Rosie’s AI Answering Service): Pros will never miss a call or lose a lead while their hands are full on the job with Rosie’s AI business management tools. Pros get the support of a dedicated office administrator without the overhead cost, ensuring they capture every incoming call and land more business while staying focused on their projects and customers.
Offer: Seven-day free trial + two months free of the Professional Plan or Scale Plan
Always Evolving to Meet the Needs of Today’s Pros
Pro Xtra partner offers will refresh quarterly and are available now within the Rewards Hub on The Home Depot mobile app or online dashboard. Offers are available to all members regardless of spend or membership tier.
The Pro Xtra Rewards Hub was recently refreshed to centralize all member benefits in one place, including partner offers, discounts, paint rewards, business tools and tier benefits. Instead of relying on one-off communications that can get lost in a cluttered inbox, members can access all rewards within the exact same app or online dashboard where they manage the rest of their business.
“Our Pro customers live on the go,” said Mike Rowe, executive vice president of Pro for The Home Depot. “They are managing crews, bouncing between jobsites and working long hours. Two-thirds of our Pro online users leverage The Home Depot app regularly to help manage their business, projects, orders and more, so it only made sense to embed these new partner offers right inside the app to give them a frictionless way to access them.”
The Home Depot selected its launch offers based on direct feedback from its Pro customers and will continue to reflect four key categories: food and beverage, fuel and fleet, lifestyle and travel, and business management — providing Pros with added benefits outside of traditional building supplies.
Not a Pro Xtra member? Pros can sign up for free online or in-store at any time to unlock membership benefits.
One-Stop Shop for the Pro
These new lifestyle offers join an already robust suite of capabilities available to Pros, including trade credit accounts tier-based preferred pricing on millions of SKUs, purchase history and tracking, dedicated on-site support from Outside Sales Representatives (OSRs) and in-store Pro Desks, and more.
To learn more about Pro Xtra, visit https://www.homedepot.com/c/pro-xtra.
If you’re a brand interested in learning more about hosting a Pro Xtra partner offer with The Home Depot, please reach out to Orange Apron Media at OAM_Strategic_Partnerships@homedepot.com for more information.
[Rewrite and expand the following content into a human-written, SEO-friendly article with a minimum of 1000 words. Never write less than 800 words. Keep all facts accurate. Add one comparison table if relevant. Return only the final HTML article without any explanations.
(BPT) – It’s hard to ignore the creeping price of the monthly utility bill and the sting of gas prices at the pump. These rising costs have made it more difficult for Americans to budget effectively for monthly expenses. How can households afford power sources that feel increasingly unreliable?
Luckily, homeowners and renters can take back control of their energy use, even amid unpredictable energy costs and volatile gas prices. Here are a few ways you can achieve energy independence and stabilize your home energy costs.
Upgrade to energy-efficient appliances
Refrigerators, washers, dryers and dishwashers are the workhorse appliances of any home. They’re also heavy energy consumers. However, you can still enjoy these modern conveniences and lighten your energy load by upgrading to certified ENERGY STAR appliances.
When you switch to an ENERGY STAR appliance, you can save 10%-50% on energy costs compared to conventional models. That’s because these modern, efficient appliances use significantly less power to do the exact same job as older models. By switching, you can keep your home running smoothly while naturally lowering your energy usage month to month.
Pro tip: Big changes start small. Consider switching your current light bulbs to energy-efficient LED light bulbs.
Install a smart thermostat
Heating and cooling account for the bulk of your monthly energy bill. So, how can you keep your home comfortable and your wallet happy? You don’t need to suffer in the sweltering summer or freezing winter. All you need to do is install a smart thermostat.
A smart thermostat learns your daily routine and adjusts the temperature when you’re sleeping or away from home. In short, it allows you to program your comfort. This instant automated control of your environment is a seamless way to lower heating and cooling costs and enjoy your time at home without the hassle and guesswork of manual adjustments.
Use heavy energy-consuming appliances during off-peak hours
Did you know that electricity costs change depending on the time of day? Check with your utility company. You may be surprised to find that you’re paying premium rates during peak hours, usually in the late afternoon and evening.
Do a little digging and find out your area’s time-of-use rates. Once you know the peak-use window, you can outsmart the grid by using your heavy, energy-intensive appliances during off-peak hours. Try running your dishwasher or doing laundry in the morning or late at night and see how much you save.
Embrace a clean energy home backup
Achieving true energy independence means having the ability to power appliances no matter what the grid is doing. To gain independence and make a sizable dent in energy costs no matter what gas prices and electricity rates are, homeowners and renters should consider always-on clean-home battery backup solutions like Jackery solar generators. Unlike traditional gas generators, these portable power stations are clean and quiet. That means no expensive fuel runs, noxious fumes or noisy operation. Plus, sunlight is free, so once you own a solar-powered generator, you can count on cost-stable energy.
Jackery’s gasless, indoor-safe home batteries pair a portable power station with solar panels so that you can capture, store and use power on your own terms. By using the solar generator’s stored power during peak hours, you can offset your energy bill and keep the essentials like refrigerators, laundry machines, fans and WiFi routers running, even when costs are high or the grid is down. You can even opt to connect a solar generator to your home’s circuits with automatic switchover, like the Jackery Solar Generator 5000 Plus combined with a smart transfer switch so backup kicks in seamlessly when you need it the most.
Jackery’s generators are designed with modern living spaces in mind and meant to fit a real home, not to hide in the shed. So, whether you need to charge your computer, power a fridge or run essentials across multiple rooms at once, there are plenty of options that let you ride out price spikes and outages without lifting a finger.
Energy savings and independence are within reach
Lowering your energy costs doesn’t mean you have to sacrifice modern comforts. Using these tips can get you started on the path to energy independence and a better energy budget, no matter the current energy and gas prices.
To learn more about how to take back control of your energy costs and the benefits of solar battery backup solutions, visit Jackery.com.