Category: Home Improvement

  • How much does it cost to install a wet room in 2026?[/gpt3]

    How much does it cost to install a wet room in 2026?[/gpt3]


    The prices in this cost guide are accurate as of 2026*

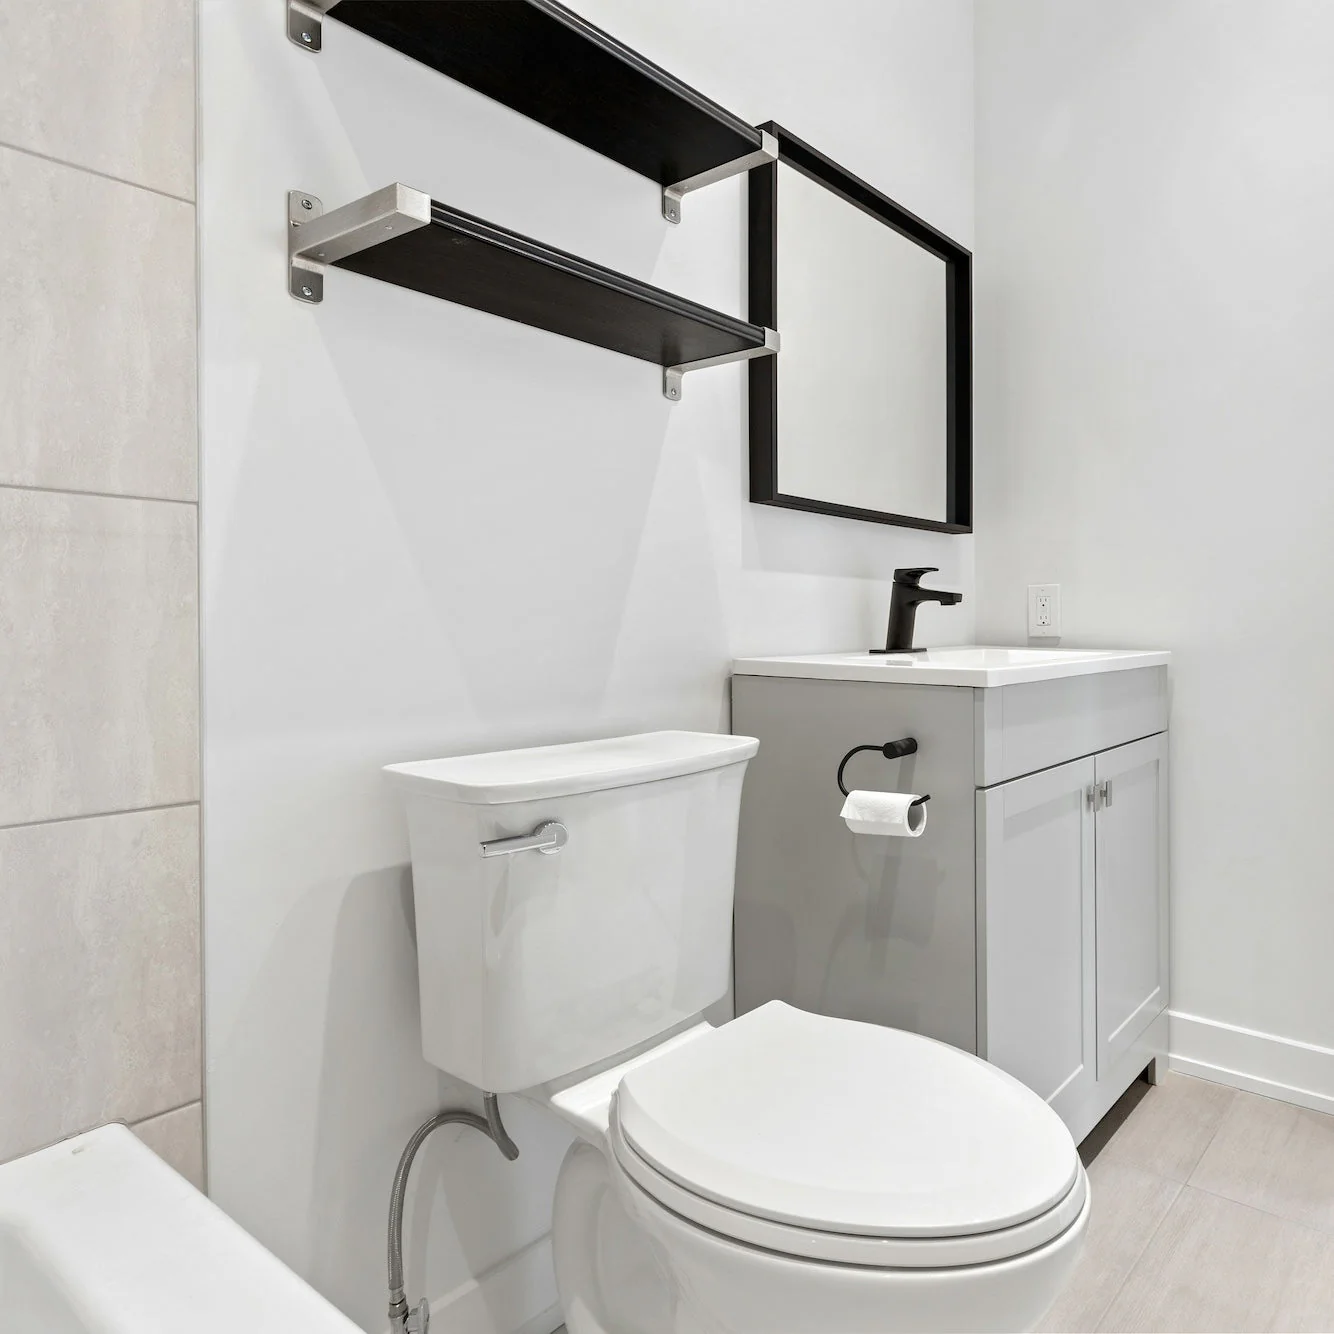
    There is nothing quite like the sleek, minimalist look of a wet room walk in shower to bring a touch of boutique hotel luxury into your daily routine. Beyond the high-end aesthetic, wet rooms are incredibly practical. They maximise space in smaller bathrooms, are far easier to clean than traditional shower enclosures, and offer ideal level-access accessibility for multi-generational homes.

    However, converting a standard bathroom to wet room setup requires highly specialised skills. If you are budgeting for this luxury upgrade, you need a clear picture of the underlying expenses. This guide breaks down the true cost of installing a wet room in the UK, from the hidden structural prep to the final finishing touches.

    How much does a wet room cost?

    When looking at the initial figures, how much does a wet room cost on average? In the UK, the total price typically ranges from £5,000 to £12,000, with most homeowners spending around £8,000 for a complete mid-range conversion.

    Unlike a standard bathroom refit, where tradespeople simply swap out old fixtures like-for-like, fitting a wet room requires the existing floor and wall structures to undergo significant preparation, tanking (waterproofing), and sloping toward a central drain.

    Cost breakdown: Where does your budget go?

    Because a wet room is built from the structural subfloor up, the total new wet room cost is split across several crucial phases:

    • Waterproofing and tanking: Applying the essential multi-layered waterproof membranes or liquid barriers across the floors and walls usually costs between £800 and £2,000 for materials and specialist labour.
    • Floor preparation & drainage: Creating a precise gradient so the water flows naturally down the drain requires a structural floor former or specialised screeding. This phase, including the installation of high-flow linear or point drains, ranges from £1,000 to £3,000.
    • Tiling and finishes: Wall and floor tiling can cost between £1,500 and £5,000. Waterproof materials like anti-slip porcelain or ceramic typically cost £20 to £100 per square metre, plus the daily rate of a skilled tiler.
    • Labour overall: A full wet room installation requires a team of multi-skilled tradespeople, including plumbers, carpenters, tilers, and electricians. Professional labour day rates generally average £200 to £300 per specialist (higher in London and the South East), with most installations taking between 7 and 12 working days.

    Wet room installation cost by room size & spec

    Your total wet room replacement cost will shift drastically based on the dimensions of your room and the quality of the fixtures you choose:

    Project scope Average room size Total cost estimate (inc. labour) What’s included?
    Small / Compact en-suite Approx. 3 m² £4,000 – £6,000 Standard ceramic tiles, point drain, basic white sanitaryware, and standard tanking.
    Standard family wet room Approx. 5 m² £6,500 – £9,500 High-performance porcelain tiles, sleek linear drain, a glass deflector screen, and upgraded ventilation.
    Large / Luxury walk-in 8 m² or larger £10,000 – £15,000+ Natural stone or large-format tiling, rainfall shower, bespoke floating vanity, and integrated underfloor heating.

    Key factors that affect your final quote

    When a bathroom specialist evaluates your home to calculate a final quote, designing a wet room properly means they will carefully inspect several hidden variables behind your walls and under your floorboards:

    1. Timber vs. concrete floors

    Installing a wet room on a ground-floor concrete base is often highly straightforward, as tradespeople can channel directly into the existing screed to lay the drainage pipework. If you are converting an upstairs bathroom to wet room layout on a timber joist floor, the exact build-up will depend entirely on your home’s existing floor structure and your installer’s technical specification. While a sloped wet room tray (former) is typically fitted to create the correct fall, some subfloors may also require structural reinforcement to bear the weight of heavy tiles and prevent movement.

    2. Ventilation upgrades

    Because a wet room creates an open, humid environment, basic bathroom extractors won’t always cut it. To prevent damp and mould from ruining your grout, you will likely need to upgrade to a high-powered, humidistat-controlled mechanical extractor fan, which typically adds £250 to £800 to the bill, including professional electrical wiring.

    3. Underfloor heating (UFH)

    When designing a wet room for ultimate comfort, integrating underfloor heating is highly recommended. Not only does it keep the floor cozy underfoot, but it also rapidly evaporates surface water, keeping the space dry and significantly reducing slip hazards. Electric mat systems can add £200 to £600 to your project budget, while a wet UFH system hooked to your central heating will cost more.

    Top tip: If you are installing a wet room specifically for an elderly relative or an individual with a registered disability, you may be eligible for a VAT exemption (saving you 20% on the total bill) or a local disabled facilities grant. Always ask your installer about this before work starts!

    Can I install a wet room myself?

    While a passionate DIYer can easily manage painting or basic tiling, a wet room installation is strictly a job for certified professionals. If the tanking membrane has a single pinhole leak, or if the floor gradient is slightly miscalculated, water will slowly track into your property’s structural timbers or leak through the ceiling below, resulting in thousands of pounds worth of structural repairs.

    Hiring an experienced specialist guarantees that the plumbing, waterproofing, and drainage work together perfectly as a single, fully sealed system.

    FAQ’s

    How long does it take to install a wet room?

    A complete wet room installation typically takes between 10 and 15 working days. This timeline accounts for stripping out the old suite, structurally altering the floor, applying the liquid or sheet tanking systems, allowing required drying and curing times, and completing the extensive tiling work.

    Do wet rooms leak easily?

    A properly installed wet room is carefully designed to be completely watertight, making it highly reliable over the long term. Unlike a standard shower tray, which relies on silicone seals that can degrade over time, a wet room uses a continuous internal barrier. Leaks are very rare and typically only occur if corners are cut during the waterproofing phase or if there is excessive uncompensated movement in the subfloor.

    What is the difference between a wet room and a walk-in shower?

    The cleanest distinction is that a true wet room involves waterproofing the entire room, allowing for a completely flush, open floor plan where the whole space can handle water. A walk-in shower, on the other hand, usually features a visible, ultra-low-profile shower tray and only requires intensive waterproofing within that specific shower zone.

    Ready to build your dream wet room?

    Say goodbye to leaky shower curtains and outdated enclosures. At Rated People, we connect you with thousands of trusted, local bathroom fitters and plumbers who can install your wet room to your standards.

    Post a job today to receive free, no-obligation quotes from rated specialists in your local area.


    Source link

  • [gptPrompt]Create a compelling, click-worthy, SEO-friendly blog title. Requirements: Maximum 60 characters, Keep the main keyword, Human written, Return ONLY the title text and nothing else. Topic: Cost of Bathroom Underfloor Heating[/gptPrompt]

    [gptPrompt]Create a compelling, click-worthy, SEO-friendly blog title. Requirements: Maximum 60 characters, Keep the main keyword, Human written, Return ONLY the title text and nothing else. Topic: Cost of Bathroom Underfloor Heating[/gptPrompt]

    [gptPrompt]
    You are an expert human content writer and SEO specialist.

    Read the reference content only to understand the topic.
    DO NOT copy, rewrite, paraphrase or follow the original article structure.
    Instead, create a completely fresh article from scratch using your own words.

    Requirements:
    – 100% unique
    – Human-written
    – SEO optimized
    – EEAT friendly
    – Minimum 1200 words
    – Simple English
    – Short paragraphs
    – No AI phrases
    – No keyword stuffing
    – Naturally include the main keyword

    Structure:

    Introduction

    Table of Contents

    Main Sections

    Use 7-10 detailed H2 headings.
    Add H3 headings where appropriate.
    Include:
    – Bullet points
    – Numbered lists
    – Practical examples
    – Expert tips
    – Comparison table (if applicable)

    Frequently Asked Questions

    Write 5 original FAQs.

    Conclusion

    Return ONLY clean HTML. Do not include markdown code blocks like “`html.

    Topic:
    Cost of Bathroom Underfloor Heating

    Reference Content:

    The prices in this cost guide are accurate as of 2026*

    Stepping onto a beautifully warm tiled floor on a freezing winter morning is one of life’s simple pleasures. If you are planning a bathroom renovation, upgrading from a traditional radiator to an underfloor heating installation is one of the best ways to bring a touch of luxury into your home.

    Beyond the sheer comfort, underfloor heating eliminates cold spots, frees up valuable wall space in smaller rooms, and can provide an efficient way to heat your space. But before you book a professional, you need a realistic view of your potential budget. This guide breaks down the real cost of installing underfloor heating in a bathroom, helping you weigh up electric vs water underfloor heating systems, running costs, and hidden installation expenses.

    How much does bathroom underfloor heating cost?

    When planning a project, your first big question is bound to be: how much does underfloor heating cost to buy and fit? On average, the total price to supply and install a system in a standard UK bathroom ranges from £300 to £1,500+.

    The reason this price window is so wide comes down to the system you choose. A single-room bathroom project will vary significantly depending on whether you opt for an electric mat system or a water-based (hydronic) network connected to your central heating.

    Cost breakdown: Electric vs. wet systems

    To help you calculate your potential underfloor heating bathroom installation cost, it helps to compare the two main options side-by-side:

    • Electric (dry) systems: This is the most popular choice for single-room bathroom renovations. It uses thin heating mats or loose cables laid directly beneath your floor tiles. Because these systems are generally low-profile, they have minimal impact on your floor height. The average cost to install electric underfloor heating in a standard 4m² bathroom typically ranges from £250 to £500 for parts and labour.
    • Water (wet) systems: These systems pump warm water through a network of pipes connected to a boiler or heat pump. While they are highly efficient over larger areas, they are thicker and require specialised floor preparation or low-profile overlay boards. Fitting a wet underfloor heating system in a single 4m² bathroom usually ranges from £600 to £1,200+ due to the extra plumbing, manifolds, and balancing required.

    Underfloor heating costs per square metre

    If you are trying to calculate a precise underfloor heating cost per m2 uk price for your specific layout, expect to see the following broad price ranges across the UK market:

    System type & project scenario Average supply & fit cost (per m²) Best suited for…
    Electric system (renovation / retrofit) £60 – £120 Single rooms, quick installation, and awkward bathroom shapes.
    Electric system (new build) £40 – £80 Clear concrete screeds or new subfloors.
    Water system (renovation / retrofit) £135 – £195 Major property overhauls, extensions, and ground-floor wet rooms.
    Water system (new build) £90 – £140 Whole-house heating designs built into the initial floor screed.

    Key factors that affect the overall price

    When a heating specialist or plumber provides a quote for installing underfloor heating in a bathroom, they look beyond the size of the room. Several critical variables can alter your final invoice:

    1. Room shape and layout

    A square or rectangular bathroom is incredibly straightforward because installers can lay standard heating mats quickly. However, if your bathroom has an awkward shape, or if the installer has to meticulously weave loose heating cables around a freestanding bath, a toilet pedestal, and a basin vanity, the extra precision required will increase the labour time.

    2. Choice of new flooring

    Underfloor heating must be paired with compatible flooring. While porcelain or ceramic tiles are the absolute best choice for conducting and retaining heat, your quote will vary depending on the finish you choose. Don’t forget to account for the cost of laying bathroom tiles, which can add an extra £40 to £70 per square metre for professional installation.

    3. Insulation boards

    Never skimp on insulation. Laying dedicated thermal insulation boards beneath your heating elements stops warmth from escaping into the subfloor below, forcing the heat upward into your room. High-quality insulation boards typically add £10 to £25 per square metre to your materials bill, but they pay for themselves rapidly by lowering your energy consumption.

    Top tip: When comparing quotes, always check if your installer includes a smart, programmable thermostat. Upgrading to a Wi-Fi-enabled thermostat adds £120 to £220 upfront but allows you to schedule your heating efficiently, ensuring the floor is only warm when you actually use the room.

    Is underfloor heating expensive to run?

    A common worry for homeowners looking at the cost of underfloor heating in a bathroom is whether their utility bills will skyrocket. If you are wondering is underfloor heating expensive to run, the answer depends heavily on your system type, insulation quality, and local energy tariffs:

    • Electric systems heat up relatively quickly, making them ideal for morning and evening bursts. However, electricity is generally more expensive per unit than gas, meaning running costs can escalate if the system is left on for extended periods. As a rough example, running electric UFH in a small, well-insulated bathroom for a few hours a day might add a modest amount to your monthly bill, but exact costs depend heavily on your thermostat settings and insulation.
    • Water systems take longer to warm up but retain their heat beautifully. If your wet system is hooked up to a modern gas boiler or a heat pump, it can be noticeably more energy-efficient than standard radiators over time. This makes it highly cost-effective for larger spaces or ground floors where the heating stays on at a consistent, low temperature.

    Can I install underfloor heating myself?

    While a confident DIYer can lay insulation boards and physically roll out an electric heating mat, you should never complete the final hookup yourself. All electrical connections must be thoroughly tested, signed off, and commissioned by a qualified, Part P-certified electrician to comply with UK Building Regulations.

    Similarly, a wet system involves complex plumbing, pressure testing, and hydraulic balancing that should be handled by a qualified heating engineer or specialist installer. If the system links to a gas boiler, a Gas Safe engineer will be needed for that specific part of the connection. One small leak under a newly tiled floor can result in a catastrophic repair bill.

    FAQ’s

    How long does it take to install underfloor heating in a bathroom?

    For a standard electric mat system, the preparation and wiring layout can often be completed in a couple of days. A water-based system requires more invasive plumbing and floor balancing, which will extend the initial timeline. Keep in mind that the total project duration will also depend on the complexity of your floor preparation, tiling, and necessary drying or curing times.

    Will underfloor heating raise my bathroom floor height?

    Electric heating mats are ultra-thin and generally have a negligible impact on floor buildup. However, water systems require thicker pipes and overlay boards, which will raise your floor level to some degree. If you have tight door clearances or threshold transitions, ask your installer about modern, ultra-low-profile retrofit wet systems.

    Can underfloor heating completely replace my bathroom radiator?

    In well-insulated, modern homes, underfloor heating can easily act as the sole heat source for a bathroom. However, in older period properties with high ceilings, you may want to pair your floor heating with a compact dual-fuel heated towel rail to ensure the room stays cosy and your towels dry quickly.

    Ready to warm up your bathroom floor?

    Don’t settle for freezing cold tiles. At Rated People, we connect you with thousands of trusted, local heating engineers, plumbers, and electricians who can install your underfloor heating safely and efficiently.

    Post a job today to receive free, no-obligation quotes from rated specialists in your local area.


    [/gptPrompt]

    Source

  • How much does it cost to install solar panels in 2026? [/gpt3]

    How much does it cost to install solar panels in 2026? [/gpt3]


    The prices in this cost guide are accurate as of 2026*

    Watching your energy bills drop while doing your bit for the planet is a winning combination. With electricity prices remaining a key household concern, generating your own clean energy has become a highly popular way to lower your monthly outgoings and protect against energy market volatility.

    However, making the leap to renewable energy requires a clear understanding of the upfront investment. This guide breaks down the true cost of installing solar panels UK wide, exploring system sizes, potential solar panel battery storage add-ons, and how long it typically takes to see a return on your investment.

    How much does solar panel installation cost?

    On average, a standard residential solar panel installation in the UK costs between £5,500 and £8,000.

    Where your project falls within this range depends primarily on the size of your house and your daily energy consumption. The good news for homeowners is that the UK government has implemented a 0% VAT relief scheme on solar panels and battery storage installations until 31 March 2027, making it an ideal window to explore potential savings.

    When researching a solar panel cost UK government grant, it is worth noting that direct fully funded options, like the ECO4 scheme or the Warm Homes Local Grant, are highly targeted towards low-income households or properties with low energy efficiency ratings. For the majority of homeowners, the 0% VAT relief serves as the primary and most accessible financial incentive.

    Cost breakdown by property size

    To help you gauge your potential project budget, here is a breakdown of typical system sizes and their fully installed price ranges:

    • Small home (1–2 bedrooms): Usually requires a 2kW to 3kW system (roughly 5 to 8 panels). The typical installed cost ranges from £3,800 to £5,500.
    • Medium family home (2–3 bedrooms): Usually requires a 4kW system (around 10 panels). This is the most popular setup in the UK, costing between £5,500 and £7,500 fully installed.
    • Large family home (4+ bedrooms): Usually requires a 5kW to 6kW+ system (12 to 15+ panels). This larger setup ranges from £8,000 to £12,000+.

    These comprehensive figures generally include the solar PV panels, the inverter (the “brain” that converts solar energy into usable household electricity), roof mounting kits, scaffolding, electrical hookups, and professional labour.

    The impact of adding battery storage

    While a standard solar array works brilliantly when the sun is shining, any surplus electricity you don’t use during the day is exported to the grid. To help improve your energy self-sufficiency, many homeowners choose to include a solar panel battery storage unit during their initial upgrade.

    Adding a solar battery allows you to store that free daytime electricity to power your home through the evening.

    • A standalone 5kWh battery typically adds £3,000 to £4,500 to your initial installation.
    • A larger 9.5kWh to 10kWh battery (ideal for larger families or those charging an electric vehicle) will cost between £5,000 and £8,000.

    While adding storage increases your upfront new solar panel cost, it can significantly lower your daily bill reductions because you rely far less on purchasing grid energy during peak evening hours.

    Key factors that affect your final quote

    When an MCS-certified installer assesses your roof to provide a final quote, they look at several critical variables:

    1. Roof access and scaffolding

    Safety is paramount during any roof installation. Standard scaffolding for a two-storey semi-detached home is typically included in your main quote, but if your property has restricted access, three storeys, or a highly complex roof shape, the logistical setup can add £500 to £1,000+ to the final labour fee.

    2. Inverter choice: String vs. hybrid

    A standard string inverter is perfect if you only want solar panels. However, if you are planning to add a battery now or in the future, you will need a hybrid inverter. Hybrid options cost roughly £500 to £1,000 more than standard versions but save you from having to replace your equipment down the line.

    3. Roof condition and orientation

    Solar panels can live on your roof for 25 to 30 years. If your roof tiles are cracked or structural timbers are failing, these must be repaired before the brackets are mounted. Fixing roof issues prior to installation can add to your initial timeline and budget, but ensures your system remains safe and watertight for decades.

    Top tip: To get paid for the excess electricity you export back to the grid, you must sign up for a Smart Export Guarantee (SEG) tariff. To qualify, your solar system must be installed by an MCS-certified professional, and your home must have a working smart meter.

    What is the payback period for solar panels?

    For a standard 4kW system costing around £6,500, the payback period for solar panels in the UK is often around 6 to 10 years.

    However, this break-even point is not a fixed baseline. Your exact timeline will vary widely depending on your specific system size, total household electricity consumption, how much energy you use during daylight hours, and the specific export tariff you secure with your energy provider. After you hit your payback year, the system essentially provides free electricity for the remainder of its 25+ year lifespan.

    Can I install solar panels myself?

    While a confident DIYer might handle basic property maintenance, solar installation requires complex structural roof work, specialised architectural design, and high-voltage DC electrical wiring.

    Crucially, to access the Smart Export Guarantee (SEG) scheme and meet building compliance expectations, systems generally need the relevant certified accreditation and must be properly commissioned and notified to the National Grid. To ensure your system is completely safe, fully insured, and legally compliant, it is highly recommended to use an approved professional installer.

    FAQ’s

    How long does it take to install solar panels?

    For most standard residential properties, the actual physical installation of the panels and electrical component hookup takes a professional team just 1 to 2 days. The scaffolding is usually erected a day or two prior and taken down shortly after the system is fully commissioned.

    Do I need planning permission for solar panels in the UK?

    In the vast majority of cases, residential solar panels fall under Permitted Development, meaning you do not need planning permission. However, clear exceptions apply if your home is a listed building, features a flat roof requiring specific angled frames, or is situated within a designated conservation area.

    How much maintenance do solar panels need?

    Solar panels are incredibly low-maintenance because they have no moving parts. The UK’s regular rainfall is generally enough to keep them clean and operating efficiently. It is recommended to have them visually inspected by a professional every few years or cleared if overhanging trees cause a buildup of leaves or debris.

    Ready to switch to solar energy?

    Take control of your utility bills and secure your home’s energy future. At Rated People, we connect you with thousands of trusted, local, and fully accredited solar specialists who can design and install the perfect system for your roof.

    Post a job today to receive free, no-obligation quotes from rated solar professionals in your area.


    Source link

  • [gptPrompt]Create a compelling, click-worthy, SEO-friendly blog title. Requirements: Maximum 60 characters, Keep the main keyword, Human written, Return ONLY the title text and nothing else. Topic: Kitchen Underfloor Heating Cost 2026[/gptPrompt]

    [gptPrompt]Create a compelling, click-worthy, SEO-friendly blog title. Requirements: Maximum 60 characters, Keep the main keyword, Human written, Return ONLY the title text and nothing else. Topic: Kitchen Underfloor Heating Cost 2026[/gptPrompt]

    [gptPrompt]
    You are an expert human content writer and SEO specialist.

    Read the reference content only to understand the topic.
    DO NOT copy, rewrite, paraphrase or follow the original article structure.
    Instead, create a completely fresh article from scratch using your own words.

    Requirements:
    – 100% unique
    – Human-written
    – SEO optimized
    – EEAT friendly
    – Minimum 1200 words
    – Simple English
    – Short paragraphs
    – No AI phrases
    – No keyword stuffing
    – Naturally include the main keyword

    Structure:

    Introduction

    Table of Contents

    Main Sections

    Use 7-10 detailed H2 headings.
    Add H3 headings where appropriate.
    Include:
    – Bullet points
    – Numbered lists
    – Practical examples
    – Expert tips
    – Comparison table (if applicable)

    Frequently Asked Questions

    Write 5 original FAQs.

    Conclusion

    Return ONLY clean HTML. Do not include markdown code blocks like “`html.

    Topic:
    Kitchen Underfloor Heating Cost 2026

    Reference Content:

    The prices in this cost guide are accurate as of 2026*

    The kitchen is undeniably the heart of the home. From rushing around making breakfast on a weekday morning to hosting family Sunday roasts, it is the one multi-functional space where we spend the majority of our standing time. Because kitchen floors are traditionally finished with hard, durable materials like porcelain tile, polished concrete, or luxury vinyl click, they can feel incredibly cold underfoot for most of the year.

    If you are planning a kitchen renovation or building a rear extension, replacing traditional radiators with underfloor heating (UFH) is a game-changer. Not only does it provide a beautifully consistent heat, but it also frees up valuable wall space, allowing you to maximise your kitchen layout with extra base units, a larger pantry, or a kitchen island.

    But before you finalise your kitchen design plans, you need a realistic understanding of the investment. This guide breaks down the true cost of underfloor heating in kitchen zones, the key structural differences to consider, and the typical running costs.

    How much does kitchen underfloor heating cost?

    On average, the total cost to supply and install underfloor heating in a UK kitchen ranges from £800 to £2,500+.

    The overall cost depends entirely on the size of your floor plan and the type of system you choose. Because kitchens are typically much larger than bathrooms and feature fixed units that restrict where heating can be laid, budgeting for a kitchen installation requires a different approach.

    Cost breakdown: Electric mats vs. water pipes

    To help you calculate your potential budget, it helps to look at how the two primary systems compare for a typical medium-sized kitchen floor space (around 12m² of heated area):

    • Electric (dry) systems: This option involves rolling out electric underfloor heating mats or loose cables directly onto a specialised insulation layer beneath your flooring. It is the most common choice for retrofitting into an existing kitchen layout because it is quick to install and has an ultra-low profile. For a 12m² heated zone, a professional electric underfloor heating installation typically costs in the region of £700 to £1,300 as a starting estimate, though this varies based on necessary floor preparation, insulation quality, and thermostat choice.
    • Water (wet) systems: An underfloor heating wet system pumps warm water through a network of flexible pipes connected directly to your central heating boiler or an air source heat pump. Wet systems are thicker and require more invasive installation work, but they offer incredible energy efficiency for larger zones. For a 12m² kitchen, a water-based system usually ranges from £1,500 to £2,800+ depending on whether it is laid into a new concrete screed or retrofitted using low-profile overlay panels.

    Average underfloor heating cost per m2

    If you are trying to estimate a rough underfloor heating cost per m2 uk price for a large open-plan kitchen diner or an extension project, expect the following guide rates:

    System type & project scenario Average supply & fit cost (per m²) Best suited for…
    Electric mat system (retrofit) £65 – £110 Existing floors, quick kitchen refreshes, and laminate/LVT finishes.
    Water-based system (retrofit overlay) £140 – £200 Extensions, older properties, and link-ups to existing boilers.
    Water-based system (screeded / new build) £90 – £145 New extensions, open-plan builds where concrete screed is poured.

    Planning an extension? 

    If you are building out your property, the water underfloor heating in a new kitchen extension cost generally lands between £2,200 and £4,000 for a typical 35m² to 45m² open-plan space. Because the pipes can be clipped down before the new liquid concrete screed is poured, installing a wet system during the primary building phase is highly efficient and much more cost-effective than retrofitting it later.

    Key factors that affect kitchen installation costs

    Designing a kitchen heating layout involves unique variables that do not apply to other rooms in the house. When a specialist provides a final quote, they will factor in the following points:

    1. Navigating fixed cabinetry and kitchen islands

    A very common design question homeowners ask is: should underfloor heating be installed under kitchen units? Installers generally avoid laying underfloor heating directly beneath fixed kitchen base units, heavy appliances, or a solid kitchen island. Doing so could cause thermal blocking, which traps the heat, wastes energy, and can potentially scorch or damage your cabinetry.

    Your installer will design the layout to run exclusively through the high-traffic walkways of the floor. This means a kitchen with a physical footprint of 20m² might only require 12m² of actual underfloor heating, lowering your initial materials cost.

    2. Existing subfloors and floor alignment

    If your kitchen is split between an old property layout and a newly built rear extension, your installer will have to balance two distinct subfloors (such as timber joists meeting a newly poured concrete slab). Ensuring a smooth, continuous, and level floor across both zones before laying your UFH can add £300 to £800 in subfloor preparation, screeding, or self-levelling compounds.

    3. Insulation quality

    Because a kitchen has a larger surface area than a bathroom, high-quality thermal insulation boards are non-negotiable. Without correct insulation beneath the heating element, a significant portion of the generated heat can escape downward into the earth or concrete subfloor, causing your system to work twice as hard and driving up your bills.

    Is underfloor heating expensive to run in a kitchen?

    When assessing if underfloor heating is expensive to run, the daily running costs will depend heavily on your chosen system and how often you use the space:

    • Electric systems are incredibly responsive but rely entirely on grid electricity, which is historically more expensive per unit than gas. This means electric underfloor heating is usually more costly to run as a primary heat source over large areas, making it best suited for shorter, localised morning and evening bursts.
    • Water systems take longer to warm up initially but retain heat perfectly within the floor structure. Because they use water heated by a high-efficiency boiler or heat pump, they are incredibly cheap to run long-term, where the heating stays on at a consistent, low temperature.

    Can I install kitchen underfloor heating myself?

    While a passionate DIYer can successfully lay down insulation boards and map out an electric mat or plastic water pipes, the final system commissioning must be handled by certified professionals.

    To comply with UK Building Regulations and protect your home insurance, all final electrical hookups and smart thermostat wiring must be tested and certified by a Part P qualified electrician. Similarly, a water-based system must be pressure tested, filled, and balanced by a qualified heating engineer to guarantee there are absolutely zero leaks before your heavy kitchen tiles are permanently laid on top.

    FAQ’s

    Which flooring is best for a kitchen with underfloor heating?

    Porcelain and ceramic tiles are the absolute best choice because they possess high thermal conductivity, meaning they heat up rapidly and retain that warmth long after the system turns off. Luxury Vinyl Tiles (LVT) and high-quality engineered wood are also fantastic options, though you must check that the specific manufacturer limits the floor temperature to the standard 27°C maximum.

    How long does a kitchen underfloor heating installation take?

    An electric mat system in a standard kitchen can usually be laid and wired within 1 to 2 days. A wet system requires more extensive plumbing, manifold setup, and pressure testing, taking 3 to 5 days. Crucially, if a liquid concrete screed is poured over a wet system, it can take several weeks to cure completely before you can lay your final tiles or turn the heating on.

    Can I put underfloor heating under a freestanding fridge or oven?

    It is highly recommended to avoid laying underfloor heating directly under or close to refrigerators and freezers, as the constant rising heat forces the appliance’s compressor to work much harder to keep your food cold, dramatically increasing your electricity consumption.

    Ready to warm up your kitchen space?

    Transform your kitchen into a comfortable, welcoming hub for the entire family. At Rated People, we connect you with thousands of trusted, local underfloor heating specialists and qualified electricians who can safely design and install the perfect heating system for your layout.

    Post a job today to receive free, no-obligation quotes from rated installation experts in your local area.


    [/gptPrompt]

    Source

  • How much does home generator installation cost in 2026?[/gpt3]

    How much does home generator installation cost in 2026?[/gpt3]


    The prices in this cost guide are accurate as of 2026*

    Power cuts are an undeniable frustration. Whether it is a winter storm knocking out the local grid or unannounced maintenance work down your street, a sudden loss of electricity instantly disrupts your routine. From heating systems shutting down to home offices cutting out mid-meeting, grid failures highlight exactly how much we rely on a constant stream of power.

    If you want to secure your property against unpredictable outages, a backup power system is an excellent solution. However, adding emergency power to your property involves more than simply buying a machine and plugging it in. This guide breaks down the true home generator installation cost, comparing portable setups with automatic standby units, and outlining the essential electrical work required to keep your home running safely.

    How much does home generator installation cost?

    On average, the total cost to supply and install a home backup power system in the UK ranges from £3,000 to £15,000+.

    The final price tag varies dramatically depending on the scale of your backup goals. Are you looking to keep a few essential lights, internet routers, and your fridge-freezer running? Or do you want a heavy-duty solution designed to power large parts of your property, including high-draw appliances, during a prolonged outage?

    Cost breakdown by generator type

    To help you map out a realistic budget, it helps to understand the two primary residential configurations:

    • Portable generator setup: This serves as a highly practical entry point. You buy a manual-start electric generator for home backup, and an electrician installs a dedicated inlet socket and manual transfer switch next to your main fuse board. When a power cut hits, you wheel the generator outside, start it, and flip the switch manually. As a rough guide, the average cost to install home generator infrastructure alongside a mid-sized portable unit typically sits between £1,000 and £3,500.
    • Permanent emergency standby generator: This is a fixed outdoor unit wired directly into your home’s mains and a continuous fuel source (like natural gas or a large tank). The second a power cut hits, it automatically detects the failure and fires up within seconds. A full supply and installation typically starts around £5,000 and could reach £15,000 to £20,000+ for premium, high-capacity systems. If you are hunting for the best standby generator for home use uk wide, top brands like Generac, Pramac, and Cummins offer ultra-reliable residential units.

    Estimated cost guide: Unit vs. labour

    If you are trying to estimate a rough budget for a permanent standby project, these guide figures outline typical market rates across the UK:

    Project component Typical price range What it covers…
    Small-to-medium standby unit (7kW – 10kW) £2,000 – £4,000 The hardware alone; enough to cover essential domestic circuits.
    Large standby unit (11kW – 20kW+) £4,000 – £12,000+ High-capacity hardware designed for larger properties.
    Automatic transfer switch (ATS) £250 – £1,000 The critical component that manages seamless power switching.
    Professional labour & electrical hookup £1,000 – £3,000+ Site prep, heavy cabling, fuse box integration, and system safety sign-off.

    Planning a whole-house system?

    If your goal is total power independence, a premium whole home generator installation cost will generally start at £9,500 and could scale past £24,000. These high-capacity systems require heavy-duty hardware (often 22kW to 48kW+), extensive natural gas or liquid propane plumbing lines, a reinforced concrete foundation, and complex power-management switching to handle your home’s total electrical load safely.

    Key factors that affect your final quote

    When a qualified electrician or specialist engineer assesses your property, they look at several critical variables to calculate the final cost of installing a home generator:

    1. Distance to your main fuse board

    A backup generator must sit outdoors in a well-ventilated area, safely away from windows and doors to prevent exhaust fumes from entering the home. If your ideal outdoor placement zone is located far away from your internal main electrical consumer unit, your installer will need to run long distances of heavy-duty, armored cabling. This extra material and the labor required to route or bury the cables can add £300 to £1,000+ to your final invoice.

    2. Fuel supply logistics

    For a permanent standby unit to work seamlessly, it needs a continuous fuel line. If you choose a natural gas or LPG model, you will need a qualified heating engineer to extend your property’s pipework out to the generator’s mounting spot. If you choose a diesel model, you may need a separate, secure external fuel storage tank. Integrating these fuel supplies typically adds £500 to £2,000 to the initial structural setup.

    3. Electrical load management

    If you intend to back up high-draw appliances like electric showers or heat pumps, your installer must evaluate the generator’s size and starting surge capacity. High-draw loads require significantly more starting power than running power, which means your generator must be accurately specified by a professional to ensure it handles the electrical demand without tripping or stalling.

    Can I install a home backup generator myself?

    While a portable generator can be manually fueled and started on a driveway by a homeowner, any work that interfaces directly with your property’s main electrical infrastructure must be handled by a certified professional.

    Splicing a generator or a transfer switch into your main consumer unit involves handling high-voltage wiring and poses severe safety risks. If a system is improperly wired without a certified transfer switch, it can cause a catastrophic safety hazard known as backfeeding. This is where your generator accidentally sends electricity backwards out of your home and onto the local utility lines, creating a fatal electrocution risk for utility engineers working down the street to fix the primary power cut.

    To comply with UK Building Regulations and protect your home insurance policy, your installation should be designed, wired, and legally signed off by a qualified, Part P certified electrician or an approved power specialist.

    FAQ’s

    How long does it take to install a backup standby generator?

    For a straightforward manual plug-in system, a qualified electrician can often complete the internal wiring and inlet installation within a day. For a larger, permanent automatic standby generator, the physical process usually takes 2 to 4 days. This allows time for ground preparation, pouring a dedicated concrete base pad, mounting the unit, completing complex electrical hookups, routing fuel lines, and running final stress tests.

    How loud are residential standby generators?

    Modern residential generators are designed with acoustic, sound-dampening canopies and are built to be relatively quiet during operation. However, actual noise levels vary significantly depending on the specific model, fuel type, and enclosure build. Your installer will help you select a suitable placement zone that minimizes noise impact and complies with local boundary considerations.

    Do I need local authority planning permission for a home generator?

    In many UK properties, installing a domestic backup generator falls under Permitted Development, meaning formal planning permission isn’t required. However, exceptions definitely apply if you live in a listed building, a designated conservation area, or if the unit sits unusually close to a neighbor’s boundary line. It is always best to double-check local planning expectations before pouring permanent concrete foundations.

    Ready to secure your home against power cuts?

    Don’t wait for the next storm to leave you in the dark. At Rated People, we connect you with thousands of trusted, local, and fully accredited electricians and power specialists who can design and install the perfect backup system for your property.

    Post a job today to receive free, no-obligation quotes from rated installation specialists in your local area.


    Source link

  • [gptPrompt]Create a compelling, click-worthy, SEO-friendly blog title. Requirements: Maximum 60 characters, Keep the main keyword, Human written, Return ONLY the title text and nothing else. Topic: Home Automation Cost 2026 | Rated People[/gptPrompt]

    [gptPrompt]Create a compelling, click-worthy, SEO-friendly blog title. Requirements: Maximum 60 characters, Keep the main keyword, Human written, Return ONLY the title text and nothing else. Topic: Home Automation Cost 2026 | Rated People[/gptPrompt]

    [gptPrompt]
    You are an expert human content writer and SEO specialist.

    Read the reference content only to understand the topic.
    DO NOT copy, rewrite, paraphrase or follow the original article structure.
    Instead, create a completely fresh article from scratch using your own words.

    Requirements:
    – 100% unique
    – Human-written
    – SEO optimized
    – EEAT friendly
    – Minimum 1200 words
    – Simple English
    – Short paragraphs
    – No AI phrases
    – No keyword stuffing
    – Naturally include the main keyword

    Structure:

    Introduction

    Table of Contents

    Main Sections

    Use 7-10 detailed H2 headings.
    Add H3 headings where appropriate.
    Include:
    – Bullet points
    – Numbered lists
    – Practical examples
    – Expert tips
    – Comparison table (if applicable)

    Frequently Asked Questions

    Write 5 original FAQs.

    Conclusion

    Return ONLY clean HTML. Do not include markdown code blocks like “`html.

    Topic:
    Home Automation Cost 2026 | Rated People

    Reference Content:

    The prices in this cost guide are accurate as of 2026*

    The concept of the home of the future is firmly a reality. Walking into a room and using a quick voice command to dim the lights, setting your heating to adapt to your daily routine, or checking your security cameras from an app while halfway across the world are no longer luxury novelties.

    Smart home technology has rapidly transitioned from a high-tech hobby into a popular property upgrade. When designed well, integrating these systems can help reduce energy waste, bolster your home security, and make your daily routine incredibly smooth. Some high-quality, professionally integrated systems may even appeal to tech-minded buyers when the time comes to sell.

    However, because smart technology can range from a single plug-in device to entirely hardwired control networks hidden behind your walls, budgeting for a project requires a clear strategy. This guide breaks down the true cost of home automation UK properties face today, the distinct tiers of setup, and how to plan your budget effectively.

    How much does home automation cost?

    On average, the average cost of home automation systems in the UK typically ranges from £1,500 to £20,000+.

    The final cost of installing a home automation system depends entirely on whether you are looking to install standalone wireless systems in a few key rooms or planning a fully comprehensive, hardwired ecosystem designed early into a major property renovation.

    Cost breakdown by automation tier

    To help you gauge your potential budget, home automation typically scales across three distinct levels of complexity:

    Entry-level setup (wireless / modular):

    This approach relies on standalone wireless products connected via your home Wi-Fi network. It usually includes a central smart assistant hub, a smart thermostat, a video doorbell, and automated lighting. As a rough estimate, a modular setup utilising an electric generator for home-style modular logic costs between £500 and £2,000 depending on how many individual devices you choose to add.

    Mid-tier integrated system (professional retrofit):

    At this level, separate systems (heating, lighting, and security) are professionally configured to communicate seamlessly with one another. This tier usually introduces multi-zone smart heating controls, automated window blinds, external smart security sensors, and localised smart switches. A professional mid-tier installation typically costs between £3,000 and £10,000.

    Premium whole-home ecosystem (hardwired control):

    Designed for comprehensive coverage, premium systems utilise central, hardwired control platforms like Control4 or Lutron. Cables are routed back to a dedicated central rack, linking your lighting, climate control, automated entry gates, and home cinema into a single unified interface. Complete projects usually start around £15,000 to £35,000+ and can scale significantly higher for large luxury properties. If you want the absolute best smart home system for property use UK wide, a professional installer can design a bespoke network tailored exactly to your floor plan.

    Estimated price guide by feature component

    If you prefer to automate your home step-by-step rather than all at once, these guide figures outline the typical installation cost of home automation system components across the UK:

    Automation component Typical cost range (installed) What it factors in…
    Smart heating (e.g., Nest, Hive, Tado) £200 – £800 The smart thermostat unit, multi-room zone sensors, and expert wiring.
    Smart lighting system £800 – £5,000+ Smart dimmers, switches, hubs, and professional electrical configuration.
    Integrated security & intercoms £500 – £2,500 Smart video doorbells, external cameras, motion sensors, and alarms.
    Automated blinds / Curtains £400 – £1,200 per window Motorised tracks, smart integration, and custom fitting.
    Multi-room audio setup £1,500 – £6,000+ In-ceiling discreet speakers, multi-zone amplifiers, and hidden cabling.

    Note: Component prices vary widely depending on the brand you choose, the complexity of your property’s wiring, and whether the work is a simple retrofit or part of a wider renovation.

    Planning a full smart house? 

    If your goal is total property integration, a premium whole home automation cost will generally start at £15,000 and can scale past £40,000. These high-capacity systems require centralised smart hubs, heavy-duty network switches, professional programming, and extensive cabling to control your entire home’s sub-systems under a unified master controller safely.

    Key factors that affect home automation costs

    When a qualified smart home installer or electrician assesses your property to provide a comprehensive quote, they look at several critical variables to calculate the final cost of installing a home automation system:

    1. Wired vs. wireless architecture

    Wireless systems are ideal for quick upgrades because they require very little structural disruption. However, if you live in a large property with thick brick walls, wireless signals can struggle to stay stable, requiring you to invest in a robust mesh Wi-Fi network costing an extra £300 to £1,000. Hardwired systems offer excellent, robust reliability compared to ad-hoc wireless setups, but routing the physical cables means cutting into plasterwork, making it an option best suited for properties undergoing a full renovation or building an extension.

    2. The number of smart ‘zones’

    In home automation, a zone refers to an independent area of control. Having a single smart thermostat control your entire house is straightforward. However, configuring a multi-zone heating system where every bedroom and communal space has its own independent digital valve requires significantly more hardware and programming time, which will increase your final labor fees.

    3. Choosing the central hub

    To get the most out of your devices, you need a smart controller to bridge them all together. If you want a seamless user experience, researching the best smart hubs for home automation is essential. Independent platforms like Homey Pro or Aeotec SmartThings act as the central brain, allowing hardware from completely different brands to talk to each other. Budgets for high-quality central hubs range anywhere from £100 to £400, excluding the specialist configuration fees.

    4. System programming and calibration

    The physical installation of a smart switch or sensor is only half the job. The real value of automation comes from custom programming, creating automated scenes (such as a morning routine that simultaneously raises the blinds, switches on the kitchen lights, and turns up the heating). Complex custom programming can add £50 to £150 per hour in specialist labor fees to ensure your system behaves exactly as intended.

    Can I install home automation myself?

    The dividing line between professional integration and diy home automation largely comes down to technical confidence and structural safety.

    While some advanced smart devices can technically be installed by a confident homeowner, any work that interfaces directly with your property’s high-voltage electrical mains, such as swapping out traditional light switches for smart dimmers, hardwiring a smart thermostat into your boiler, or mounting complex external security networks, is probably best left to the professionals.

    Depending on the specific electrical work and the product involved, certain installations may fall under UK Building Regulations and require a qualified person to sign off on the safety compliance. Hiring an experienced specialist ensures your system is safely installed, protected against network vulnerabilities, and correctly configured from day one.

    FAQ’s

    Does home automation help lower energy bills?

    Smart climate control and automated lighting systems are excellent for reducing energy waste, preventing you from heating an empty house or leaving lights on in unused rooms. However, the actual savings on your energy bills will depend heavily on your household’s personal use patterns and how well-insulated your home already is.

    How long does a smart home installation take to complete?

    For an entry-level or modular retrofit upgrade, a professional electrician can often have your primary hubs, switches, and thermostats up and running within 1 to 2 days. For a comprehensive, hardwired whole-home network, the installation timeline can stretch across several weeks, as it moves in tandem with your property’s building, plastering, and decorating schedules.

    What happens to my automated home if the Wi-Fi drops out?

    Most high-quality, professionally installed automation systems are designed to retain their core functionality even if your internet connection fails. Your physical smart wall switches, light dimmers, and heating schedules will continue to operate locally within the house, though you will temporarily lose the ability to control them remotely via your smartphone or voice assistant until your connection is restored.

    Ready to transform your living space?

    Take control of your home’s comfort, security, and energy efficiency. At Rated People, we connect you with thousands of trusted, local, and fully accredited electricians and smart home specialists who can design and build your perfect automated system. Post a job today to receive free, no-obligation quotes from rated installation specialists in your local area.


    [/gptPrompt]

    Source

  • How much does installing a water softening system cost in 2026?[/gpt3]

    How much does installing a water softening system cost in 2026?[/gpt3]


    The prices in this cost guide are accurate as of 2026*

    Dealing with limescale is a daily battle for countless households across the UK, particularly in hard water hotspots like the South, East Anglia, and the Midlands. From scrubbed-raw shower screens to chalky buildup around kettle elements, hard water definitely leaves its mark everywhere.

    Worse still is the hidden impact on your plumbing. Over time, limescale can quietly accumulate inside your boiler, hot water cylinder, and home appliances. This restricts water flow and forces your heating systems to work harder to warm up, which can trigger higher energy bills and potentially reduce the reliable working lifespan of your appliances if left unmaintained.

    If you are tired of aggressive cleaning chemicals and want to protect your home’s infrastructure, an ion-exchange water softener system for home protection is an excellent solution. This guide breaks down the true cost of installing water softener system hardware, the different types of units available, and what to expect from professional plumbing fees.

    How much does water softener installation cost?

    On average, the total cost to supply and professionally fit a domestic water softener in the UK ranges from £700 to £2,500.

    For a standard three-bedroom semi-detached family home, the complete cost of water softener system installation usually lands somewhere between £1,100 and £1,900 all-in. The wide pricing window is mostly driven by the capability of the unit you choose, your household water consumption, and the layout of your existing pipework.

    Cost breakdown by system type

    The technology behind water treatment varies, directly affecting both the performance and your upfront hardware budget:

    • Budget single-cylinder electric systems: These models rely on an electric timer or digital meter to flush and regenerate the system with brine water at pre-set intervals. While compact and affordable, you will temporarily have no soft water available during the regeneration cycle. A basic single-tank system generally costs between £400 and £800 for the unit alone.
    • Mid-to-premium twin-cylinder non-electric systems: These dual-tank units are powered entirely by the kinetic energy of your incoming water pressure, requiring zero electrical wiring. Because they have two resin cylinders, one is always filtering your water while the other cleans itself, giving you an uninterrupted, 24/7 supply of soft water. Highly popular among families, these premium units (from leading brands like Kinetico, Harvey, or EcoWater) range from £850 to £1,700+ for the hardware.
    • Commercial or large-capacity systems: If you own a large property with five or more bathrooms, multi-jet power showers, and high simultaneous water demands, you will need a commercial-grade high-flow system. These robust units typically start around £2,000 and can scale past £3,500.

    Estimated price guide: Unit vs. labour

    If you are trying to budget for your plumbing project, these guide figures outline typical market rates across the UK:

    Project component Typical price range What it covers…
    Water softener unit only £400 – £1,700 The hardware itself, varying by cylinder count and brand efficiency.
    Professional plumbing labour £150 – £450 Standard installation, system positioning, and plumbing connection.
    Additional plumbing materials £50 – £200 Bypass valves, copper or flexible high-flow hoses, and overflow lines.
    Optional outdoor insulated cabinet £150 – £250 A weatherproof, frost-resistant housing if cabinet space is tight indoors.

    Upgrading to an integrated filtration system?

    If you want to tackle both limescale and drinking water purity simultaneously, a combined home water softener and filter system is a highly popular option. Adding an inline activated carbon or multi-stage reverse osmosis filter alongside your softener will usually add an extra £150 to £450 to your hardware and installation costs, giving you bottled-quality water straight from a dedicated kitchen tap.

    Key factors that affect your final quote

    When a qualified plumber or water treatment specialist evaluates your home, several technical variables will dictate the estimate of your final cost of water softener system installation:

    1. Location of the plumbing infrastructure

    Whenever possible, installers look to position a water softener close to your property’s internal stopcock, which is commonly situated inside a kitchen sink base unit or an adjacent utility room cupboard. This ensures all water entering the house is treated immediately. However, if space is tight, units can also be successfully fitted in garages, ventilated basements, or even an insulated outdoor cabinet, though running the extra pipework can increase your labor fees.

    2. Accessibility to waste drainage

    During its self-cleaning phase, a water softener needs to discharge its accumulated mineral brine water safely out of the house. This means the unit must be positioned within reasonable reach of a washing machine standpipe, a sink waste trap, or an external drain line. If your plumber has to install a dedicated waste run through walls or floors to create an accessible drainage point, it will add to the complexity of the job.

    3. Water pressure and flow rates

    Modern unvented hot water systems and high-end combi boilers rely on high flow rates to deliver strong shower pressure. Your installer will check your incoming mains pressure before choosing a unit. If your property suffers from poor water pressure, a basic softener might restrict your flow further, meaning you may need a low-pressure configuration or an integrated booster pump, increasing your total material costs.

    Can I install a water softener system myself?

    While some budget water softeners are marketed online as DIY-friendly kits using flexible push-fit hoses, it is highly recommended to hire a professional plumber for the job.

    Fitting a softener involves cutting directly into your property’s fresh water supply. If it is plumbed incorrectly, you risk restricting your home’s main water pressure, creating a hidden leak that could damage cabinetry, or accidentally back-contaminating your supply.

    A professional installer will ensure an appropriate bypass valve system is fitted. This allows you to easily isolate the softener for servicing or use unsoftened water for tasks like watering the garden, which saves you money on salt. Furthermore, many premium manufacturers will only honour their extensive parts warranties if the system is commissioned and signed off by an approved installer.

    FAQ’s

    How much does it cost to run a water softener annually?

    Running costs depend on your household water consumption and the specific model you choose. For a standard family home, you can expect a typical annual spend of roughly £60 to £135 on block or tablet salt, alongside a modest increase in your water bill for the water used during the self-cleaning cycle. For electric models, the electricity consumption is generally negligible, typically estimating out to less than £10 a year.

    What is the best home water softener system for an average UK property?

    For the average three-to-four-bedroom UK family household, the best home water softener system configuration is widely considered to be a non-electric, twin-cylinder metered unit. Brands like Harvey (such as the Minimax M3) and Kinetico are top industry choices because they operate using incoming water pressure alone and provide a continuous supply of soft water without any electrical downtime.

    Can you drink softened water?

    The ion-exchange softening process adds a very small amount of sodium to the water. While it is generally considered safe to drink for most healthy adults, the extra sodium means it isn’t ideal as a primary drinking source. Specifically, the Department of Health advises against using softened water to prepare infant formula. To be entirely safe and practical, most installers will route a dedicated, unsoftened hard water tap to your kitchen sink specifically for drinking, cooking, and filling the kettle.

    How long do water softener systems last?

    A high-quality, professionally maintained twin-cylinder water softener can easily last between 15 and 20 years. Lower-end, budget electric single-tank units generally have a slightly shorter lifespan, often requiring replacement or internal resin adjustments after 6 to 10 years.

    Ready to say goodbye to limescale?

    Protect your plumbing, eliminate crusty buildup, and enjoy softer water throughout your home. At Rated People, we connect you with thousands of trusted, local, and fully accredited plumbers and water specialists who can integrate the ideal softening system into your property. Post a job today to receive free, no-obligation quotes from rated installation specialists in your local area.


    Source link

  • Why you should book your landscaping service through Rated People[/gpt3]

    Why you should book your landscaping service through Rated People[/gpt3]


    Whether you are dreaming of porcelain paving patios, architectural retaining walls, or a complete garden redesign to create an outdoor living room, a premium landscape transformation is a major investment.

    When you are spending thousands of pounds to overhaul your outdoor space, you want to ensure the job is done right the first time. But knowing how to screen contractors and align your budget with complex structural designs can feel incredibly daunting.

    If you are wondering what you should look for when hiring a landscape service, we have broken down the essential criteria below, and explained how booking through Rated People Projects takes the risk, stress, and guesswork out of the entire process.

    What should I look for when hiring a landscape service?

    When you are investing in large-scale hardscaping or structural garden design, you are hiring a specialist structural contractor who focuses on heavy construction alongside the green spaces. To protect your property and your wallet, look for professionals who provide:

    • Robust public liability insurance: This is essential. Major garden transformations often involve heavy machinery, excavation, or structural changes that could affect walls and foundations. A trusted tradesperson will always have comprehensive insurance to protect both you and your property against accidental damage.
    • A proven hardscaping portfolio: Landscaping requires high-level technical expertise in drainage, soil physics, and material science. Ask to see a gallery of past structural installations, particularly projects similar to yours, such as porcelain tile laying, brickwork, or timber decking.
    • Transparent, itemised quotes: Avoid vague estimates. A professional quote should clearly break down the costs of materials (such as sub-base aggregates, paving, and turf), machinery hire, waste disposal skips, and labor.
    • Clear compliance and safety standards: If your garden requires complex retaining walls over a certain height, extensive structural steps, or specialised drainage systems to comply with UK Sustainable Drainage Systems (SuDS) regulations, your contractor must understand these legal specifications.

    The stress-free solution: Rated People Projects

    If you are planning a premium garden transformation, managing multiple quotes and trying to verify credentials yourself can take up a lot of time. That is where Rated People Projects comes in.

    For high-end, complex landscaping jobs, our dedicated service acts as an extra layer of support. We do the initial groundwork before you hire a contractor, helping to connect you with experienced tradespeople quickly and easily.

    Here is why booking your premium landscaping project through Rated People Projects is a smart choice for your home:

    1. We verify your project brief and budget upfront

    With standard services, vague project details can lead to wildly varying quotes from contractors. With Rated People Projects, our team speaks directly with you before your job goes live to clarify your structural plans and target budget. This ensures contractors see an accurate, detailed brief from the start, helping them provide more realistic quotes much faster.

    2. You get access to experienced, highly-skilled tradespeople

    A premium landscape project requires a specific skill set. When your job is published as an Agent Verified project, it is shared with our network of trusted tradespeople. These are highly rated, skilled specialists who have the structural expertise and proven track record required to deliver complex, large-scale outdoor renovations.

    3. We match you with speed and precision

    Searching for available, reliable builders or landscapers independently can involve a lot of dead-end phone calls. Because our team pre-qualifies your project brief, local 5-star tradespeople can review an accurate scope almost instantly. This helps streamline the matching process, making it easier to find an available specialist who wants to take on your specific type of project.

    Planning a premium garden transformation?

    Don’t leave your investment to chance. Whether you are expanding your living space outdoors, building a luxury patio, or installing structural terracing, let our team help you build it right the first time.

    Post your job today and we’ll sort the rest. Rated People – The power to get it done.


    Source link

  • The essential checklist: What to consider before remodelling your house [/gpt3]

    The essential checklist: What to consider before remodelling your house [/gpt3]


    Embarking on a whole-house remodel is an incredibly exciting milestone. Whether you are stripping back a Victorian terrace to create a modern open-plan family hub, adding a double-storey extension, or completely reconfiguring your layout to maximise natural light, a major renovation is a fantastic way to tailor your home to your exact lifestyle.

    However, a large-scale renovation is also a major financial and emotional investment. Without careful planning and the right technical guidance, it is easy for budgets to stretch and timelines to slip.

    If you are wondering what you should consider before remodeling your house, we have put together the ultimate planning checklist—and explained how Rated People Projects can help you navigate the journey safely.

    What should I consider before remodeling my house?

    Before the first sledgehammer swings, taking the time to address these critical structural and financial questions will save you significant time and stress down the line:

    • Define your core objectives vs. nice-to-haves: Write down exactly what isn’t working with your current layout. Do you genuinely need more square footage (an extension), or do you just need to use your existing footprint better (a reconfiguration)? Prioritise structural necessities, like rewiring, damp proofing, and roofing, before allocating your budget to high-end finishes.
    • Understand permitted development and planning permission: Not all remodels require full planning permission. Many extensions and loft conversions fall under Permitted Development (PD) rights, provided they meet specific criteria regarding height and boundary limits. Check with your local planning authority early to confirm exactly what approvals you will need.
    • Establish a realistic contingency fund: In any large renovation, unexpected issues can arise once walls are opened up, especially in older UK properties. Structural steel requirements might change, or you might discover plumbing issues. Always set aside a non-negotiable contingency fund of 10% to 20% above your main builder’s quote to cover these surprises.
    • Plan your living arrangements: Living on-site during a major remodel can be incredibly stressful, particularly when kitchens or bathrooms are completely decommissioned. Factor the emotional and financial cost of temporary accommodation into your master plan if you are overhauling the core living areas of your home.

    How Rated People Projects can help

    Coordinating a full-house remodel involves managing multiple trades, from structural engineers and bricklayers to plumbers and electricians. If you are handling a large-scale project, trying to manage all the moving parts yourself can quickly feel like a second job. That is where Rated People Projects comes in.

    For extensive home renovations and high-value builds, our dedicated service gives you a dedicated layer of professional support, helping you move from the initial design phase to a confirmed booking with complete peace of mind.

    Here are three practical ways booking through Rated People Projects protects your investment:

    1. We thoroughly check your plans and specifications upfront

    When managing a large-scale remodel, vague initial details can lead to wide variations in builder quotes. With Rated People Projects, our team contacts you within 24 hours of posting your job to discuss your architectural drawings, structural plans, and overall budget. By ensuring all parameters are clear from the start, we help create a comprehensive brief so interested tradespeople can provide realistic, accurate quotes right away.

    2. You connect with experienced, multi-skilled tradespeople

    A whole-house remodel requires a main contractor who can seamlessly manage sub-contractors, stick to building regulations, and keep the project on schedule. When your job goes live as an Agent Verified project, it is shared with our network of top-rated, trusted professionals. These are specialists who have the proven track record and project management expertise needed to deliver major structural renovations.

    3. We streamline the matching process to save you time

    Chasing available builders for large projects can take weeks of phone calls and site visits. Because our team pre-qualifies your project details, local 5-star tradespeople can assess your brief instantly. Up to three interested specialists can quote on your project, allowing you to compare profiles and reviews efficiently so you can secure the right team for your build without unnecessary delays.

    Ready to start your home transformation?

    A successful house remodel depends on clear planning and the right technical expertise. Whether you are planning a structural extension, a full layout reconfiguration, or a complete top-to-bottom refurbishment, getting the details right at the start makes all the difference.

    Post your job today and we’ll sort the rest. Rated People – The power to get it done.


    Source link

  • Roof tiles vs. slate: Which roofing material is best for your house?[/gpt3]

    Roof tiles vs. slate: Which roofing material is best for your house?[/gpt3]


    Natural slate is often considered the gold standard of roofing materials. If you are leaning towards a premium finish, slate offers several unmatched advantages:

    • Unrivalled lifespan: While standard concrete tiles generally last between 30 to 50 years, a high-quality natural slate roof can easily last 100 years or more. It is truly a once-in-a-lifetime investment.
    • Exceptional weather resistance: Slate is incredibly dense and has an extremely low water absorption rate. This means it is resistant to frost damage, heavy downpours, and blistering heat, making it ideal for the unpredictable UK weather.
    • Timeless, premium aesthetics: The natural texture and authentic, varied tones of slate provide a luxury aesthetic that synthetic materials simply cannot replicate. It is often a necessity for period properties, conservation areas, or high-end modern builds.
    • Low maintenance and fireproof: Slate is completely fireproof and highly resistant to moss growth. Once properly installed by a specialist, it requires very little maintenance compared to standard tiles.

    How do I choose the right slate roof tiles for my house?

    If you decide that slate is the right route for your home, you will need to navigate a few key choices to ensure it suits your property and your budget:

    • Natural vs. man-made (artificial) slate: Natural slate is quarried from the earth (with Spanish and Welsh slates being incredibly popular in the UK) and offers ultimate longevity. Man-made slate, often crafted from a blend of fiber cement or synthetic resins, gives a similar look at a lower material cost and a lighter weight, though it won’t match the 100-year lifespan of natural stone.
    • Check your roof’s load-bearing capacity: Natural slate is significantly heavier than modern concrete tiles. Before you buy, you must have a structural expert assess whether your existing roof timber and rafters can safely support the extra weight.
    • Factor in the roof pitch: Every roofing material has a minimum pitch (angle) at which it can be safely laid to ensure water drains away properly. Natural slate typically requires a steeper pitch than certain interlocking concrete tiles, so your roof’s slope will dictate your options.

    Roof tiles vs. slate: A quick comparison

    If you are still on the fence, here is a quick look at how standard roof tiles stack up against natural slate:

    • Cost: Standard clay or concrete tiles are much more budget-friendly upfront and faster to install. Slate requires a higher initial investment for both materials and specialist labor.
    • Installation: Modern roof tiles often interlock, making them straightforward to lay. Slate is a traditional craft; each piece must be individually graded, hand-holed, and nailed into place, requiring a highly skilled specialist slater.
    • Durability: While modern tiles are incredibly robust, concrete can degrade and fade over decades. Slate retains its color and structural integrity for centuries.

    How Rated People Projects can help

    Replacing or upgrading a roof is a major structural project that requires absolute precision. A poorly installed roof can lead to devastating water damage and structural issues down the line. Trying to verify contractors and compare complex roofing quotes yourself can be incredibly stressful, which is why Rated People Projects is designed to give you extra support.

    For large-scale, high-value roofing jobs, our dedicated service offers a tailored approach to ensure you move from planning to booking with total confidence.

    Here are three practical reasons to consider booking your roofing project through Rated People Projects:

    1. We review your structural specifications and budget first

    With standard services, vague project details can lead to varying quotes from contractors. With Rated People Projects, our team speaks directly with you within 24 hours of posting your job to clarify your roofing plans, chosen materials (like natural slate vs. concrete tiles), and target budget. This ensures interested tradespeople see an accurate, detailed brief from the start, helping them provide more realistic quotes much faster.

    2. You connect with highly-rated roofing specialists

    Slate roofing and major structural tile replacements require a highly specific, traditional skill set. When your job is published as an Agent Verified project, it is shared directly to our network of trusted tradespeople. These are highly rated specialists who possess the technical expertise and positive customer reviews needed to deliver high-quality, complex roof installations.

    3. We seamlessly connect you with the right specialists 

    Chasing available, reliable roofers independently can involve weeks of dead-end phone calls. Because our team pre-qualifies your roofing brief upfront, local 5-star trades can review an accurate scope instantly. Up to three interested specialists can quote on your job, allowing you to compare profiles and genuine customer feedback efficiently so you can secure a trusted specialist quickly and efficiently. 

    Ready to secure your home’s roof?

    Don’t leave your biggest property investment to chance. Whether you are opting for traditional natural slate or modern clay tiles, getting the technical details and structural checks right at the start puts you in an ideal position to get your project moving. 

    Post your job today and we’ll sort the rest. Rated People – The power to get it done.


    Source link